Monday, April 18, 2011

The Versatile Blogger Award

What a Fantastic Surprise! I was given The Versatile Blogger Award by a blog I just discovered: Chocolate  Drool and Kisses.  She hosts a linky party called Sharing Mondays.  It is a beautiful blog and a great name! Anything with the word chocolate in it makes it better!!! (The Chocolate Muffin Tree)


First here are 7 things that you may not know about me:

1.  I am the youngest child in a family with 4 children.
2.  I met my husband the first day of college.
3.  I was an Elementary Art Educator for several years.
4.  I learned how to drive in a Chartreuse VW Bus!!! (Van)
5.  I met Christian Slater and Martha Plimpton (Actors) because of an art award that I won in HS.
6.  I had ducks as pets in suburbia. (at one time 4 of them)
7.  I met my best girlfriend when I was 7 years old and we are still best of friends!

Now to the 15 bloggers that I feel are worth such an Award:


To accept the award,  there are several steps:

-Thank the person who gave you the award and link them back to your post.

-Tell us seven things about yourself.

-Award fifteen recently discovered bloggers (tried my best....just started blogging 2 months ago!)

-Contact these bloggers and let them know they've received their award.

Naturally Decorated Eggs: Marbled Technique

Don't these look incredible?  I am amazed how they turned out. I can thank my third grade teacher for this idea!! Don't you want to know how to make these?  Keep reading.  We collaborated with Rachelle from Tinkerlab and she has some amazingly beautiful Vegetable Dyed Eggs too, be sure to check them out! Click on the link after this post!


 First of all you'll need some uncooked white eggs---no need to hard boil them because this is part of the process.
Besides the uncooked white eggs you'll need:

About a 9x9 inch piece of fabric for each egg
(I cut apart an old dress shirt)

string

for the pigment you'll need:
Onion skins (red,brown,yellow)
spinach
blueberries
cranberries

for texture you'll need:
(I used what I had)
rice
barley
lentils
cooked spaghetti

a cooking pot
water
vinegar

The first step is to take a raw egg and place it in the middle of your fabric.  Be careful---the eggs are uncooked! I had to keep telling my daughter this! This girl is such a ham----or I could have posted the picture of her intensely frowning!!!! (those were my choices!)


Next,  choose red/yellow onion skins and spinach to surround the egg.  Then within those items place rice, barley, lentils, and any other textured food item that will not disintegrate while cooking.  I happened to have some cooke spaghetti and that made some awesome textures!  Also, you can smash some blueberries in there too.  We did some but, I wish we would have added more. Next time!


Cassie enjoyed picking out all the items but she was a little confused with what we were doing?? I had to explain to her that the food has "paint" in it and that it will make the eggs a color! Also, that the spaghetti (which she wanted to eat) and other textural items would create a pattern or design on the egg!


Once you have all the materials surrounding the egg,  then you need to bundle up the fabric and tie it.  Make it a fairly tight wrap, but don't break the egg! Don't they look cute? Reminds me of a meal I make: Rice Bundles! We'll have to do a posting of them!


Now place the bundles in a pot and cover with cold water and add about a 1/2 Tablespoon of vinegar to the mix. The water should be about one or two inches above the eggs. Bring to a boil. Then reduce heat and simmer for 10-15 minutes.  I lifted them out with tongs and set them on a baking rack. When they are cool enough to touch cut the string and you'll be in for a pleasant surprise!


Again, I think they look absolutely AMAZING! I love the spaghetti and rice textures! I also love the touch of blueberry stain. Next time I would make a whole egg with a bunch of smashed blueberries. They  have a very subtle look, but I've loved this technique since I was in elementary school! Cassie enjoyed seeing the result and guessing what all the items were! A little bit like opening a Christmas gift!! Yes, and they are edible hard boiled eggs too!


Do you think you would want to try this technique?

Do you have any ideas for different food items that you might  add to this recipe for this naturally dyed marbling technique?

What are some of your special egg dyeing techniques?

***Be sure to check out Tinkerlab's Vegetable Dyed Egg post here!***


***It sure would be nice to be in the Top 50 on Babble....Click here and give me a thumbs up! THANKS!


This post is linked to:

Egg Dyeing Experiments With Tinkerlab

I was very excited when Rachelle from Tinkerlab asked me to do a collaborative post about egg decorating with her. Tinkerlab is one of my favorite blogs!!! I so enjoyed her post Rolled Easter Egg Painting and gave her the idea of why not  use a wooden egg (instead of a plastic egg) and include that as a creation?---a two for one deal ! You get a decorated egg keepsake and a painting! Rachelle and I are both posting today about the "Two for One" idea and an additional egg decorating idea related to Naturally Dyed Eggs.  Make sure to check out Tinkerlab's post here.(after you check out mine, of course!!!) My Naturally Dyed post can be found here.

Here Are our Decorated Wooden Eggs from our Rolled Easter Egg Painting
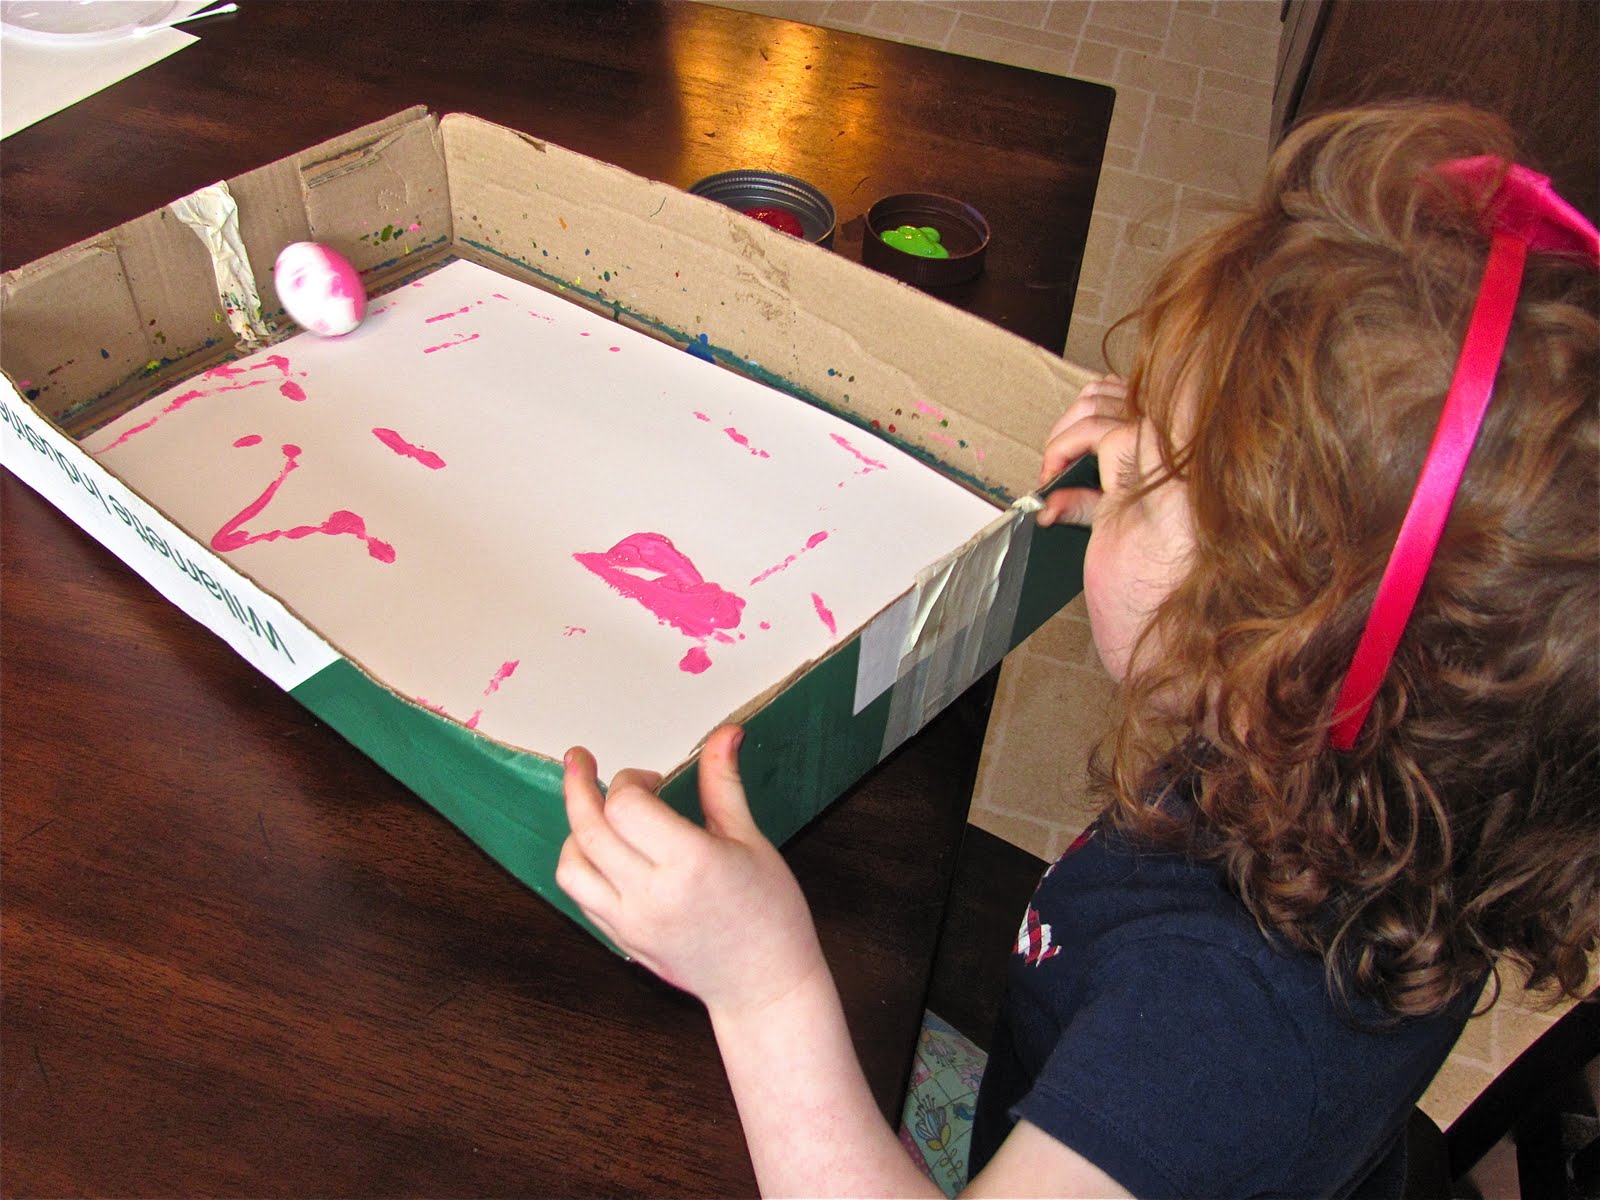
Cassie and I really enjoyed this rolled easter egg painting idea.  I explained it to her in advance and she immediately wanted to get started! You'll need a wooden or paper mache egg, acrylic paint (so it will adhere to the egg), a tray or box lid, and paper to fit.

We dipped the egg in a color and would roll it and repeat the process with other colors. Here is Cassie starting the process.


She really was serious about this and quickly realized that the egg was much trickier to maneuver as compared to a ball.


LOOK at her CONCENTRATION...she was glued!
Cassie really Loved this and wanted to do it again and again!


A Lovely Rolled Easter Egg Painting was created:


And Another painting...Mom loved this too!!!! 
Very Jackson Pollackish!!


And some Beautiful keepsake wooden/paper mache decorated eggs!
Both at the same time: 2 for 1
We did a bunch more!


Love them!
Keepsakes for future Easter baskets to treasure!


Do you have any special Easter treasures that you display year after year?

Be sure to check out Tinkerlab's post on this same process here!
(They added Glitter!)


***Thanks for the Inspiration Tinkerlab!***


**Be sure to check out our Naturally Dyed Marbled Eggs Here!!**


This post is linked up to:


Thursday, April 14, 2011

Egg Shaped Lanterns

Ever since we did our Tissue Paper Mache Eggs from a previous post I've been toying with this idea and have finally completed it.  I really wanted the Tissue Paper Mache Eggs to be transparent, but we had to do a few layers so they did turn out beautiful, but they were opaque.  I was looking through Scribble Art
a great kid's art book by Mary Ann Kohl and noticed an idea for the yarn eggs, but at the end of the idea it mentioned putting tissue paper over it for an extension.  This was my light bulb moment and this is how these Egg Shaped Lanterns came to be!!! I Love how they turned out! I'm so pleased with these!


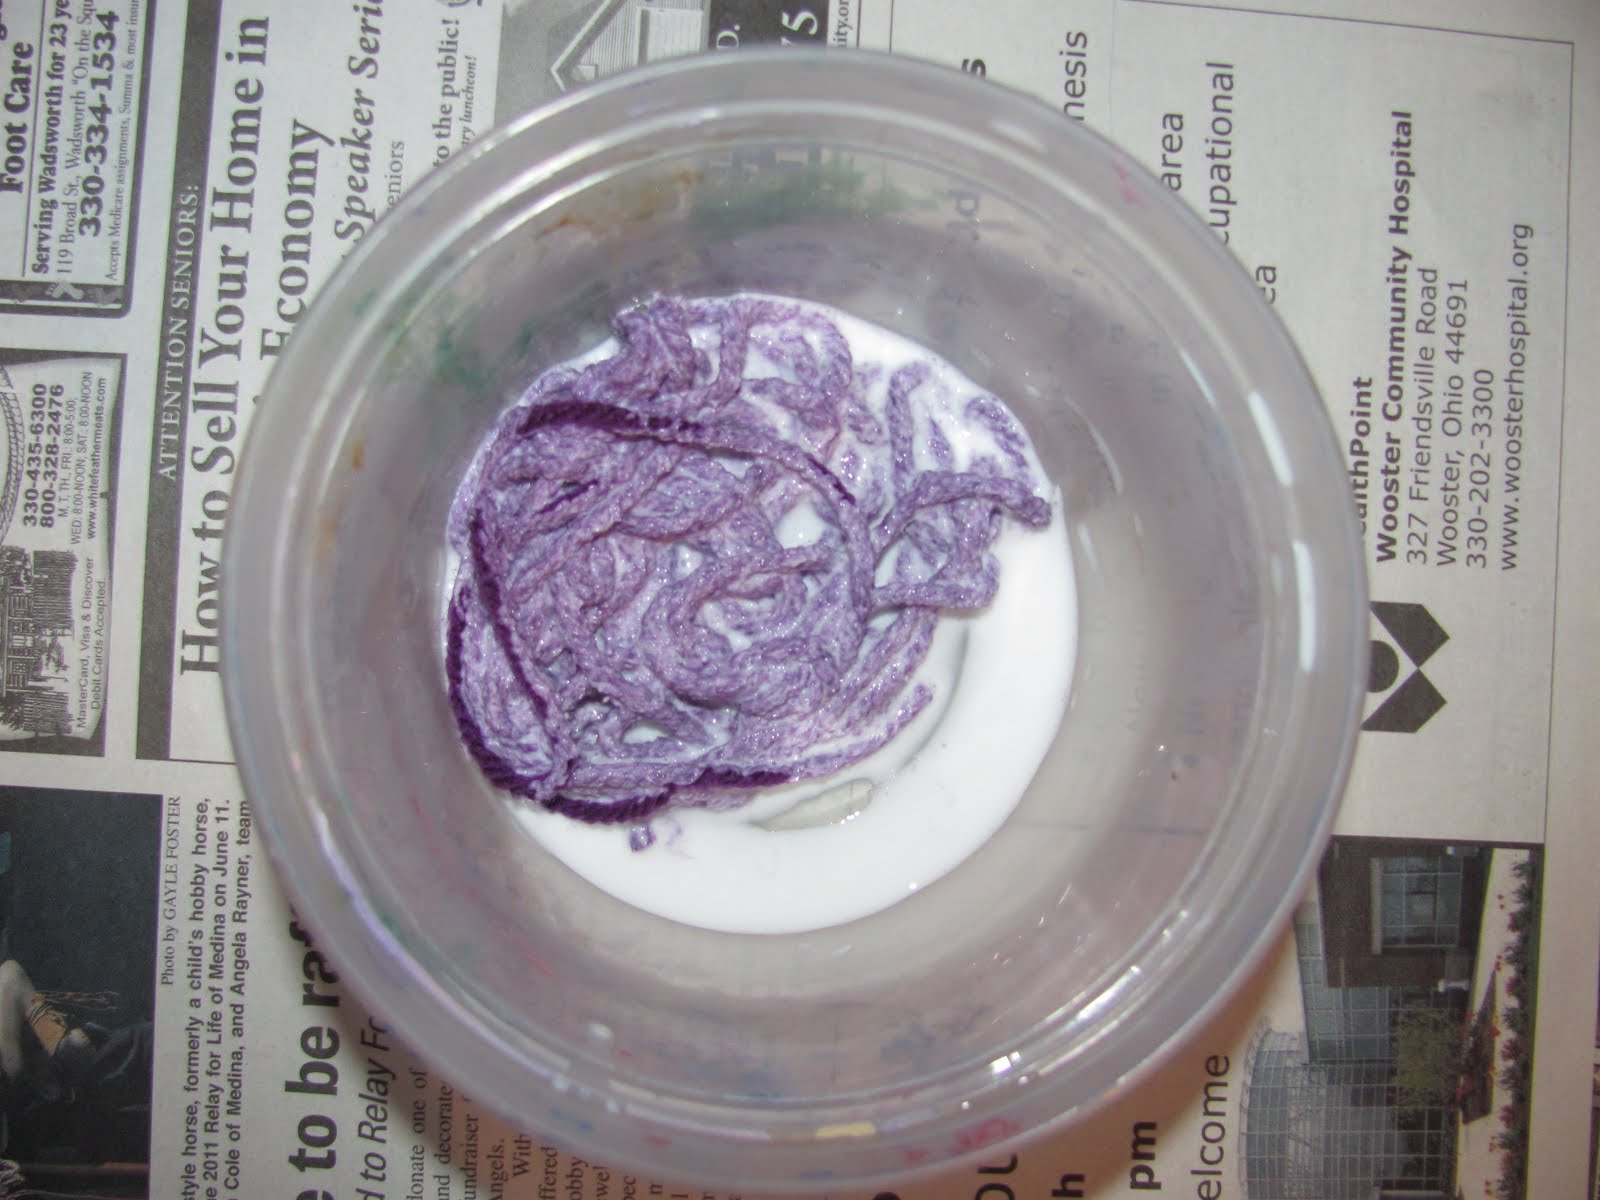
To begin,  cut some 12 inch yarn pieces----about 8 pieces or so.  You'll need white glue in a container--enough to soak the yarn in!


Soak the yarn in the glue for a few minutes. I spread out the pieces for Cassie because she cannot stand being sticky!!!


Set a water balloon in a cup (I cut down a yogurt container to fit) and you are ready to wrap yarn around the balloon.  You can take some glue off between your fingers, but leave most of the glue on the yarn!


Here is Cassie wrapping the yarn on the balloon. I had to help pick the balloon up to get it all around or it will easily fall off the balloon!


Here is our yarn wrapped balloon---we did 2 of these at a time!


Now for the tissue paper part---make sure it is not bleeding tissue!  I cut up some squares in put them in a pile.  Make  a mixture of 2 parts glue to 1 part water to apply the tissue paper.  We placed the tissue paper on the yarn balloon and went over it with a brush (Thank you Imagination Tree for the tip!) which made it so much easier to handle because your hands didn't have to get as sticky!


All you have to do is one layer and cover the balloon so that  it will be transparent.  Don't forget to throw some glitter on too!  The great thing is that this only took a day or so to dry and you are ready to pop the balloon and hang!  Love this idea!


I punched holes in the tissue paper and attached the yarn or you could attach it to the yarn of the balloon too! This seems like a great indoor patio decoration! 


WHAT DO YOU THINK?

This post is linked to:

Tuesday, April 12, 2011

Melissa and Doug Swirl 'n Spin Art Machine Giveaway

*****WINNER SELECTED!!! Joanna from we heart art!!

I am having my First giveaway for a Melissa and Doug Swirl 'n Spin Art Machine!!!! We LOVE Spin Art!!!  We would like one of our wonderful readers to have an opportunity to win one of these great toys!! This great set has created wonderful Spin Art for us in our last post: Spin Art Easter Eggs and in our February post: Pop Artish Spin Art Valentines!


OUR SPIN ART EASTER EGGS
click to see post

ONE OF OUR SPIN ART VALENTINE HEARTS
click to see post
****WINNER WAS SELECTED****
Thanks to those who entered!!!

Giveaway is open to all US residents.

For your chance to win make a comment on this post about my blog or about a creative idea you have for spin art.

Also for extra entries:

Make a comment on one of my spin art posts above (click below the picture)!!!
Blog about this giveaway on FB or Twitter!
Become a fan on Facebook!
Follow me on Twitter!
Become a Google Follower!

Winner will be chosen at random and will be contacted by e-mail.
Giveaway ends Tuesday, April 19th 2011 @ 8:00 pm EST.

GOOD LUCK!