Showing posts with label Winter. Show all posts

Monday, January 7, 2013

The Value of Creating Snowmen

We never tire of making snowmen. I think I have made snowmen with my daughter ever since she could walk.  Not only is it a great excuse to get outside, but there is so much more value in this activity.  I must think there is value or else we wouldn't make them every winter.

Snowmen are so fun to make. They teach kids a lot. Obviously they teach kids about building and creating but there is so much more. When waiting to create a snowman each year I explain to my daughter about why the snow has to be a certain temperature before it can pack together(32 degrees and above), so there is definitely Science involved in the process. When we start building there is a lot of problem solving going on such as: "How large each "snowball" should be?"  and "Why the snow is falling apart....? and so on? Once the basic structures are built there are lots of decision making skills such as: "What will we make the eyes out of?" or "Who will the Snowmen look like?"

We had fun deciding to use pipe cleaners for mouths and pom poms for eyes/noses/buttons.  We lost our snowman kit so we had to be more inventive. We tried using candies too, but they wouldn't stay in very well and they were too small.

We also found if we used a popsicle stick to create a hole that the pom poms would stay in place more securely.

We had so much fun using our imaginations to come up with ideas for their hair.  We have always used hats in the past and the evergreen tree pieces and dead flowers made such a creative alternative. Snow Paint makes another great way to decorate a snowman too.

While making these snowmen my daughter commented on how these snowmen will make people smile
since our neighbors always enjoy seeing our creations. I think she remembered when we made a Snow Bunny and a neighbor put treats in the bunnies basket. So another value of creating snowmen could even be brightening someone's day. Once the snowmen begin to melt there will be a Science lesson on the temperature of when snow melts. The lessons are endless....Who would of thought?

Pin It

Friday, December 28, 2012

Making GIANT Snowflakes

The other day we started making GIANT Snowflakes and it has been a HUGE hit with my daughter.  These snowflakes have made wonderful window decorations that literally fill the sections of our windows. They make great holiday and Winter decorations to brighten up the drab days of Winter here in Ohio.  Also, they would be a great way to bring some snow to warmer climates out there.
To make these GIANT Snowflakes you'll need:

Large White Gift Tissue 
Scissors

The White Tissue Paper is great to use because you can fold this paper countless times cut easily through many layers.  It is a little tricky to fold, but you could have the tissue pre-folded for your kids and show them how to cut shapes.  My daughter mostly cut triangle shapes which is the easiest shape to cut.

Here are the steps.  Basically you fold the square into a triangle and keep matching each corner to corner to create smaller triangles. Between steps 5 and 6 you want to round the top so the snowflake will be a circular shape. Then begin cutting shapes on each edge. My daughter mostly cut triangle shapes because that is the easiest shape to cut. You can definitely experiment with different shapes.

Have FUN! Children and adults get a lot of satisfaction from cutting snowflakes.

And it is always a surprise each time you open a folded snowflake. This activity could be a science experiment in which you predict what each snowflake might look like.  It is a great lesson in symmetry too. Also, you could pair this activity with my Exploring Snowflakes...Up Close post and observe real snowflakes and learn about Wilson Bentley who took the first pictures of snowflakes.  Look how big this snowflake is compared to my daughter....AWESOME!

Here is some of our window display from outside our house.  They look wonderful! I'm sure it brightens everyone's day when they go by our house. I know it makes me smile each time I see them. 
HAPPY WINTER!
Enjoy making snowflakes...

Pin It

Wednesday, February 22, 2012

Our Local Ice Festival 2012

Our town managed to pull off their annual Ice Festival even though it has been a considerably warm winter! It is a weekend in which ice sculptors come from all over to demonstrate their creative skills.  There is a competition in which the sculptors can win ribbons too. Many of the sculptors had to contend with the warm sun and some even shaded their sculptures with cardboard at certain points!  Thankfully it was colder by Sunday and most of the sculptures held together,  but by Monday there were 40 degree temperatures and sun by the afternoon.  Some of the sculptures were starting to form icicles on them because of the melting ice and dripping!  I just wanted to share some of the AWESOME sculptures that were created considering the warmer temperatures.


It was definitely a great experience to see the ice sculptors at work.  C was fascinated with the variety of tools the artists were using: chain saws, sanders, brushes, and more!


Here is just a sampling of some of the sculptures!  A flying squirrel!


A fish that won a blue ribbon.  Whenever we have gone to art shows C is fascinated with the ribbons.  I try to explain to her that judges pick which ones win! I asked her which Ice sculptures she liked best and she said, "The ones with the ribbons!"


A bee which is our HS mascot! 


A seahorse...which was another ribbon winner.


Not sure if this is Praying Mantis or what? It looks to be part something else.


Ironically, I got a shot of the moon sculpture at night!


The poor Moon sculpture fell over by Sunday morning! Unfortunately, this was a common sight at this years festival!


There were many more sculptures.  We enjoyed the festival and it was a great learning experience for C to watch how the sculptures were made!  Hopefully next year will be colder for the Ice Festival!

Do you have a Winter or Ice Festival where you live?

How has the weather been in your neck of the woods?


Wednesday, January 18, 2012

Snowy Hearts

If you've been following me a while you know that I LOVE Land Art.  We've done quite a few Land Art Posts that you can check out here or at the end of this post.  Winter introduces a whole new medium: SNOW!  It adds a crisp white background to everything.  We made Snowy (Land Art) Hearts since Valentine's Day is on our mind! Check them out and let me know what you think!

Evergreen Bush and Cranberries
More Evergreen and Cranberries
C painting our Snow heart on a tree
Recipe for snow paint click here
Finished Painted Snow Heart

A great book to go with our Snowy Hearts is Snow Valentines by Karen Gray Ruelle. The brother and sister cat in this book create Snowy Valentines because they want to be unique! This is such a sweet Valentine book!


I'm sure we will be doing more Snowy Land Art this Winter!
Stay tuned! 


Land Art Posts:
Rain Shadows

This post is linked to: Link and Learn

Tuesday, January 17, 2012

Exploring Snowflakes... Up Close

Have you every really looked at snowflakes?  Real snowflakes up close?  Well,  that is what Cassie and I did recently after finally getting some snow! (snow has been a precious commodity this winter) Either way this activity is fun to talk about even if you haven't had snow or live in an area with no snow accumulation.  Here is a picture of what a snowflake can look like up close.  Keep reading to find out how we did this activity and the fabulous book that we read too!


First we gathered a black piece of construction paper and a magnifying glass.  Some sites like Weather Wiz Kids recommend putting the paper in the freezer,  but it was a cold enough day for us!


Then we caught snowflakes on the black paper and our mittens.  It was a little easier catching them on our dark mittens because our paper would blow about at times!!! We observed lots and lots of beauties! Each snowflake is truly different and it is nice to show this through this activity.  C was a little scientest practicing her observation skills.


When we observed the snowflakes we saw all kinds of shapes very similar (but different) to these pictured below.  Each snowflake is different depending on the temperature,  humidity, wind speed,  and how long it takes for the snowflakes to hit the ground.  I'm sure if we observed snowflakes each time it snowed they would be different.  If you don't have snow you could observe Snowflakes Photographs from a Google Image Search by clicking here.  My daughter was fascinated at looking at the pictures too!!!


An excellent kid's book to go with this activity is Snowflake Bentley, by Jacqueline Briggs.  It is a true story about a man, Wilson Bentley, whom they called "Snowflake Man".  Wilson Bentley was obsessed with taking pictures of snowflakes in the late 1800's and early 1900's.  He was the first to do this and had a true passion for doing this.  He published a book in 1931, Snow Crystals ,with over 2,500 photographs of snowflakes!!! There is a Snowflake Bentley Museum too! 
 

Have Fun Observing Snowflakes!

Links:

Painting With Ice Cubes

This post is linked to: Link and Learn

Friday, January 13, 2012

Two Kinds of Snow Dough

There has been a lot of buzz about Snow Dough lately!!! You ask, "What is Snow Dough?", basically it is White Play Dough.  There are a lot of recipes floating around claiming to be the best recipe for Snow Dough and we tried a few of them.  It came down to two recipes and one that was ultimately our favorite! Keep reading to find out our Favorite Snow Dough!  My daughter and I had a lot of FUN playing with Snow Dough and here are some of our creations:  snowmen, snow snails, and snow caterpillars!  It is definitely fun to add pipe cleaners, buttons, beans, and beads!!!


The Snow Dough pictured on the left is from Family Fun Magazine and you can click here for the recipe. This recipe makes a nice modeling compound and it is made with flour as its main ingredient.  It claims if you put white tempera paint in it that it will make it white,  but not as white as our favorite! This recipe is a cook play dough recipe.

Our Favorite Snow Dough:
The Snow Dough on the right is from the The Imagination Tree (one of my favorite blogs!!!) and you can click here for the recipe.  This recipe uses corn starch (or corn flour) for its main ingredient which makes it a wonderful bright white!  I believe it is the whitest of all the recipes we tried.  This dough is much more smooth and silkier which is always a plus! (it could be the addition of glycerin)  We definitely enjoyed this recipe the best! Oh, and more..... this recipe is is a no-cook play dough recipe and Gluten Free!


With both recipes you can add iridescent glitter and snowflake sequins which adds a sparkly touch!  Both recipes make a great sensory experience for working out tiny fingers.  So whatever ingredients you have on hand I'd suggest you try one of these fab recipes for Snow Dough!


We had so much fun with Snow Dough we decided to pack up some snow dough for our friends along with the accessories of pipe cleaners, beads, beans, toothpicks, and some snowflake sequins.  Our friends had a blast with this and my daughter played with her snow dough for three days straight! Snow Dough makes some great pretend snow play for those of you out there who don't have any snow!!!


Hope you have fun with Snow Dough too! I'm sure you will!!! Let me know if you find (or have) a secret recipe for Snow Dough that you and your children enjoy!

Friday, January 6, 2012

Snowflakes From Recycled Water Bottles

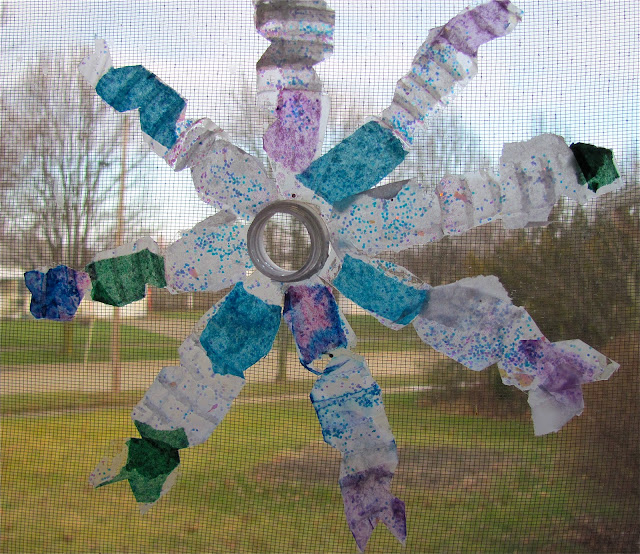
Today I'm guest posting over at The Artful Parent!!! I'm truly honored to be on Jean's blog since her blog is one of the main reasons I started The Chocolate Muffin Tree.  I started following The Artful Parent in 2009 after seeing it recommended in Parent Magazine.  I hope you can pop on over to find out how we made these Snowflakes From Recycled Water Bottles here.  We had a lot of FUN and they turned out GORGEOUS!
Thanks to The Artful Parent for her continued inspiration...hope you enjoy the post!!!


Thursday, January 5, 2012

An Experiment in Making Snow!

I often think about my readers that don't get snow,  so I thought they would appreciate a post on making snow!  We haven't really gotten much snow here in NE Ohio until recently and I can't imagine never really experiencing snow.  We had fun comparing our real snow to our homemade snow.  To create some snow all you need is a blender and some ice cubes!


First, pop about 16 ice cubes in your blender.


Then blend until you have ice that has turned to snow.  Make sure your blender is strong enough to grind ice! Here is our Instant SNOW!!!


C was AMAZED that we made snow!  We ran outside and grabbed some REAL snow and I told her to make some observations.  Can you guess which one is the real snow????  Pretty convincing???


C noticed the REAL SNOW was colder,  softer, and didn't taste as good!!!


C observed the HOMEMADE SNOW was warmer,  harder, and tasted better!!!  Both snows could form into snowballs when warmer.  Both melted....the homemade snow melted faster!


C had a great time with this experiment and I'm sure she will ask to do it again!!!

Check out this link from Weather Wiz Kids to find out all kinds of FACTS about SNOW,  like How is Snow Formed,  How do Blizzards Form, What are Snowflakes, Why is Snow white,  and more.....

If you don't want your snow to melt try some Insta-Snow and you just add water!

Also, check out this GREAT post At TinkerLab:  Making Fake Snow for some tips about Insta-Snow!!  

Which Snow do you think is the REAL SNOW in the photo with the two bowls of SNOW??? (the left or right bowl)

This post is shared with: It's Playtime, The Play Acdaemy, Link and Learn