Showing posts with label Rainbows. Show all posts

Saturday, March 16, 2013

Rainbow Crayon Resist

Crayon Resist activities are always fun and when you add rainbows to the mix that even adds more enjoyment for kids. This is always a magical activity for kids,  and why not think about pairing it up with St. Patrick's Day or Spring Weather activities?
Pin It

Materials Needed:
Crayons (white always works best!)
Watercolors in rainbow colors
Paint brushes
White paper

First,  draw with crayons with firm pressure onto white paper.  White crayons always look coolest! Then paint with rainbow watercolors over the crayon drawings. SO simple an Magical every time!

I always enjoy this activity and my daughter does too! 

We made Crayon Resist Easter Eggs last year!

Sunday, March 10, 2013

Rainbow Coffee Filters

This is a simple activity to create beautiful rainbows for Spring. We always seem to drag out the coffee filters to draw or color on.  I think I have a zillion posts about coffee filters so at the end of this post you can click on the links to see them.
Pin It
Materials Needed
Coffee Filters
Water-based Markers
Newspaper
Spray Bottle with water

Make sure to lay down some newspaper on your work area. Then begin coloring and drawing rainbows on coffee filters.

After you have filled up your coffee filter with marker colors, then spray some water and make sure newspaper in underneath because the color will bleed through. Also, not to much water or the colors will completely disappear!

Ta da! Happy Rainbow Making...we may make a garland of these...

Coffee Filter Ideas:


Tuesday, March 13, 2012

Shaving Cream Marbled Rainbows

I've said it before, but I just LOVE Marbling with Shaving cream.  It is such an easy way to marble paper with lovely results.  Rainbows have been quite popular the past month, so we decided to create some Shaving Cream Marbled Rainbows.  It is the same process as our Shaving Cream Marbled Hearts, but I will still go over the steps to review.


First, spread out some foamy shaving cream on a flat surface or in a tray or pan.  Smooth it out a bit.


Then use either food colors or liquid watercolors and put blobs of color with a paint brush or eye dropper.   We made the colors in Rainbow order: Red, Orange, Yellow, Green, Blue, and Violet.  Liquid Watercolors give the most vibrant color!


Next swirl/marble the colors with a stick.  We used a kebab stick.  You could use a toothpick, popsicle stick, or even a stick from outdoors. If you had a fancy comb you could use that too.


Gorgeous color!


Now put a piece of paper on top of the swirled colors and press down and smooth your hands over the paper.


Lift up the paper.


Then use a flat edge to scrape the shaving cream off the paper.  You could use a lid cut in half or even a piece of cardboard with a straight edge.


Scraping off the shaving cream reveals Gorgeous Rainbow Marbled Paper!


This is a lighter version when the shaving cream and pigment have mixed up.  If you want brighter results put a brand new clean layer of shaving cream and add the Liquid watercolors.


What would you create with this Rainbow Marbled Paper?


Tuesday, February 28, 2012

Creating Rainbows With Toy Cars

Today I'm over at PreK + K Sharing Blog. Please check out my post: Creating Rainbows With Toy Cars here. We had SO MUCH FUN with this! Pop on over for all the details and other great posts on this collaborative blog of very talented bloggers. Let me know what you think.


Monday, February 27, 2012

Styrofoam Rainbow Prints

We've been busy creating with rainbows lately! C loves drawing rainbows and knows the color order of them well too.  Over this past week we decided to create Styrofoam Rainbow Prints.  Pretty Fun and colorful. Keep reading to find out how we made them.


To create Styrofoam Rainbow Prints you'll need:

styrofoam trays
a dull pencil
tempera or acrylic paint in rainbow colors
paint brushes (foam brushes would work great for this!)
paper


First,  cut the edges of your styrofoam tray off to form a flat piece of foam.  Then, you can either pre-plan your drawing and transfer to the foam or draw directly on the styrofoam with a dull pencil.  Press into the foam with the pencil to make an impression, but not so hard that you create a hole in the foam.  My daughter created these drawings pretty quickly....your child may spend more time.  (Remember words will be backwards.)


Then, I put out red, orange, yellow, green, blue, and violet tempera paint with a brush for each color. You could use acrylic paint too.  C then brushed a strip of each rainbow color across her foam drawing.
Try to use a thinner layer of paint or the print will not come out very well. ***A foam paint brush would work really well for this!


Here is how the paint should look.  C's first print did not come out because she had too much paint, but the great thing about printmaking is that you can create multiple pictures if you mess up.


After you have the paint on the styrofoam tray,  take a piece of paper and put it over the painted tray.  Then take your hands and rub over the paper with some pressure so the paint will transfer to create a print.


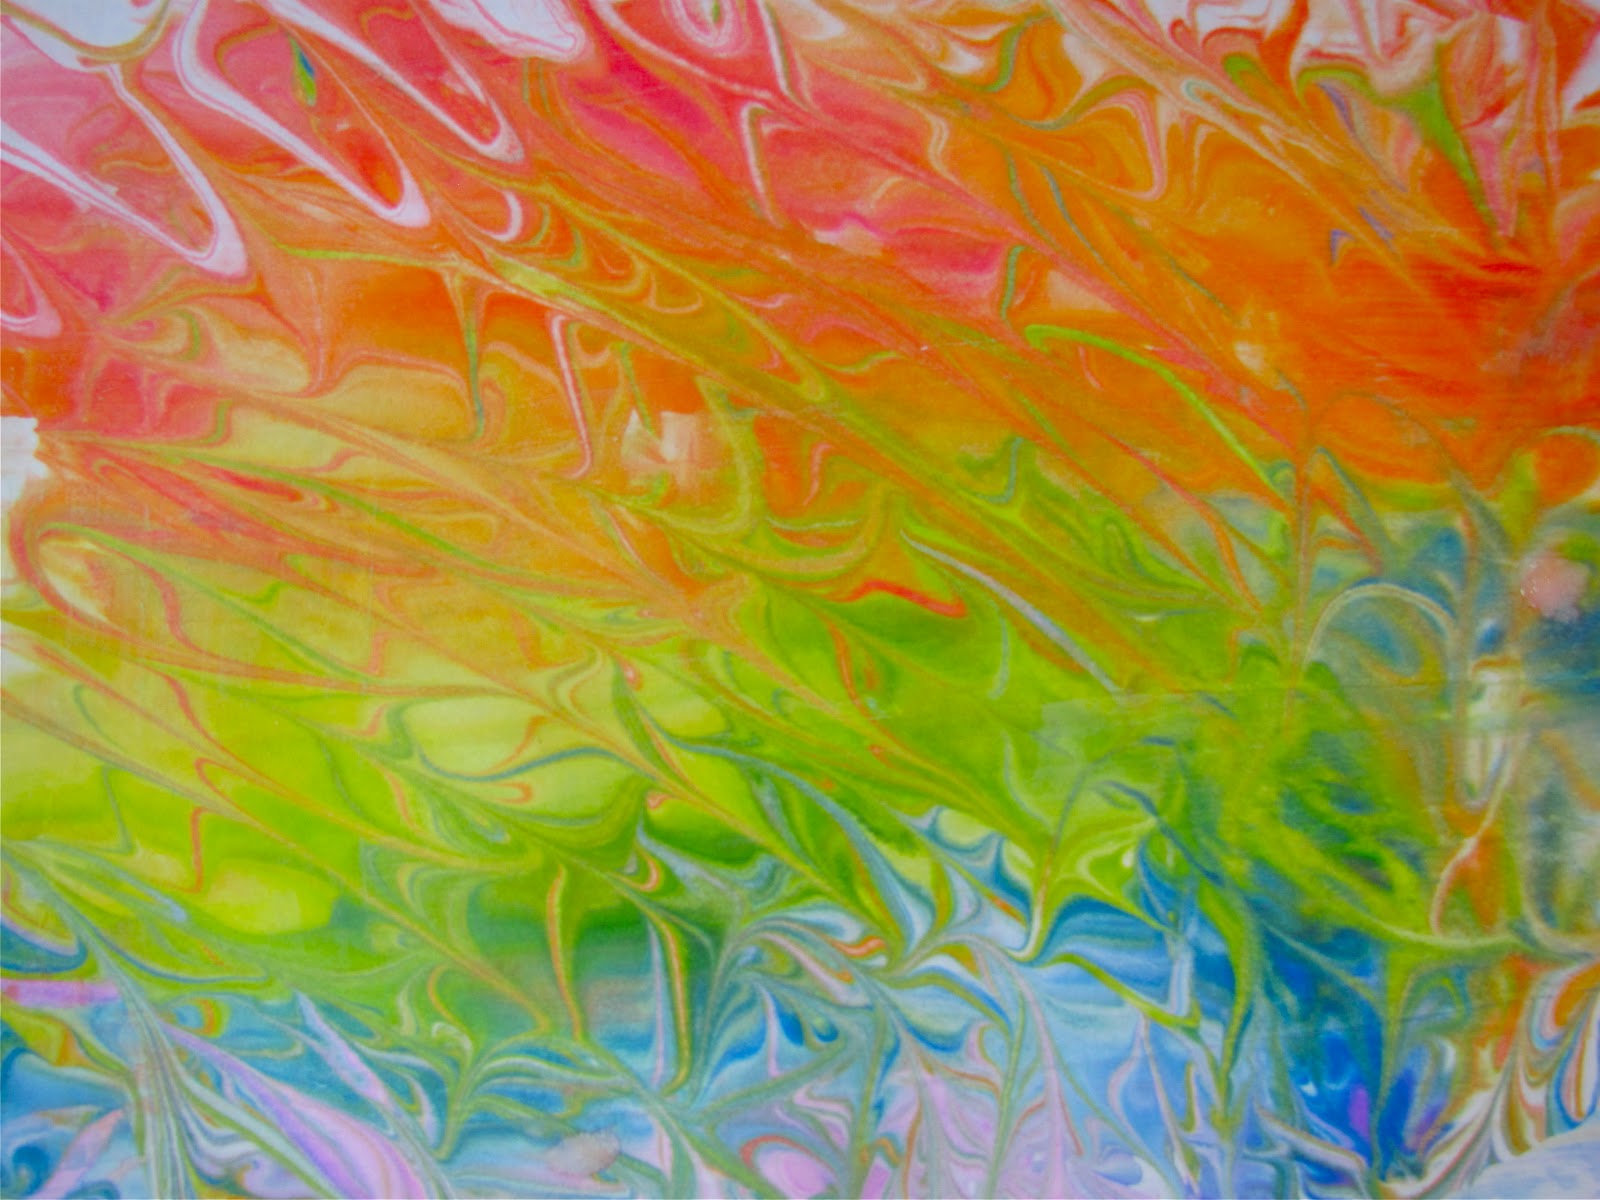
As you can see, we created many many styrofoam Rainbow Prints. This is the beauty of printmaking and  it is very addicting. I think they are just LOVELY!


What Rainbow projects have you been working on with children?

***Check out our Shamrock Apple Prints and Glue Prints for some more Printmaking Fun.

Thursday, April 7, 2011

Paint Chip Rainbow Chain

Another project with paint chips: a Paint Chip Rainbow Chain! (Be sure to check out our Paint Chip Collages.) Very simple and easy to do! All you need are some paint chips from your local home improvement store, scissors/paper cutter/x-acto blade, and a stapler.  Cassie is great with the stapler,  but with this project it was difficult for her to do it herself. I had to hold the paper and she could squeeze the stapler.  Here is a finished chain:


Here is our beautiful arrangement of paint chips cut into strips.  I used a paper cutter which worked out really well to cut pretty straight strips.  You may even be able to find paint chips that are already long thin rectangles to form into chains.  Grab a stapler and your ready to go!


These chains would make a great decoration for Spring to brighten up any room.  They would also be a great decoration for a rainbow themed birthday party which I've seen at  the blogs The Imagination Tree and Paint Cut Paste. Two great blogs with amazing ideas!


Still having fun and thinking of more ideas with paint chips!!! 

A reader gave me an idea for my Paint Chip Collage post:
Use paint chips in "earth" tones or "grey" tones to make a collage for a rainy day!
The ideas are endless!

Friday, March 4, 2011

Roy G. Biv!!!!!


I posted this because I mentioned Roy G. Biv in my previous post about creating rainbows and shamrocks. This is from Here Comes Science a great DVD/CD  by musical group They Might Be Giants.  It is a great Science resource for kids and it was nominated for a Grammy!

My daughter created a beautiful rainbow and we talked about this video while making it! We first made shamrocks by creating 3 circles and attaching a stem. As you can see, they were filled in with green.  I set out the markers in rainbow order which made it easier for her to follow the color spectrum.
RED ORANGE YELLOW GREEN BLUE INDIGO VIOLET 

Here is the wonderful rainbow and shamrocks by my daughter:


This post is linked up to: