If you've been following me a while you know how much I love paint chip (paint sample) projects. (other paint chip ideas listed at the end of this post) Here is my latest paint chip project.... just in time for all the summer holidays. All you need are some paint chips in red and blue shades, scissors, and glue.
Here are all 4 versions of my Interpretations of the USA flag. I think I was inspired by artist Jasper Johns.
(1)
(2)
(3)
(4)
I did these as part of Tinkerlab's DPS Challenge. You check out the challenge here if you want to join.
I'm sure these had to be some of my inspiration:
Three Flags by Jasper Johns
Two Flags by Jasper Johns
Have fun creating with paint chips!
************
Other Paint Chip Ideas from The Chocolate Muffin Tree:
Today I am over at PreK + Sharing blog. Find out some different ice play ideas to beat the heat. Let me know what you think of all the ideas and which ones are your favorite or ones you might use with kids. You can view the post here.
Do you let your Children Paint? I hope so. I was looking through all my photos and noticed pictures of easel paintings that C did when she was 3. I must of been obsessed....this was before The Chocolate Muffin Tree. I think I felt every mark that my daughter made was significant. Being an art teacher, I felt it was so important to have her paint and she loved it so much! I never told C what to paint....it was always a very open ended activity every time. As a 5 year old she hasn't done as much easel painting and maybe I need to break out the easel again and see what she might paint.
3 Year Old Painter At Work.
Joyful Painter with her hard hat on.....she was obsessed with hats of all kinds!
I miss my little 3 year old...soon she will be 6!
Do you think it is important to let children paint?
What are your experiences with children and Painting?
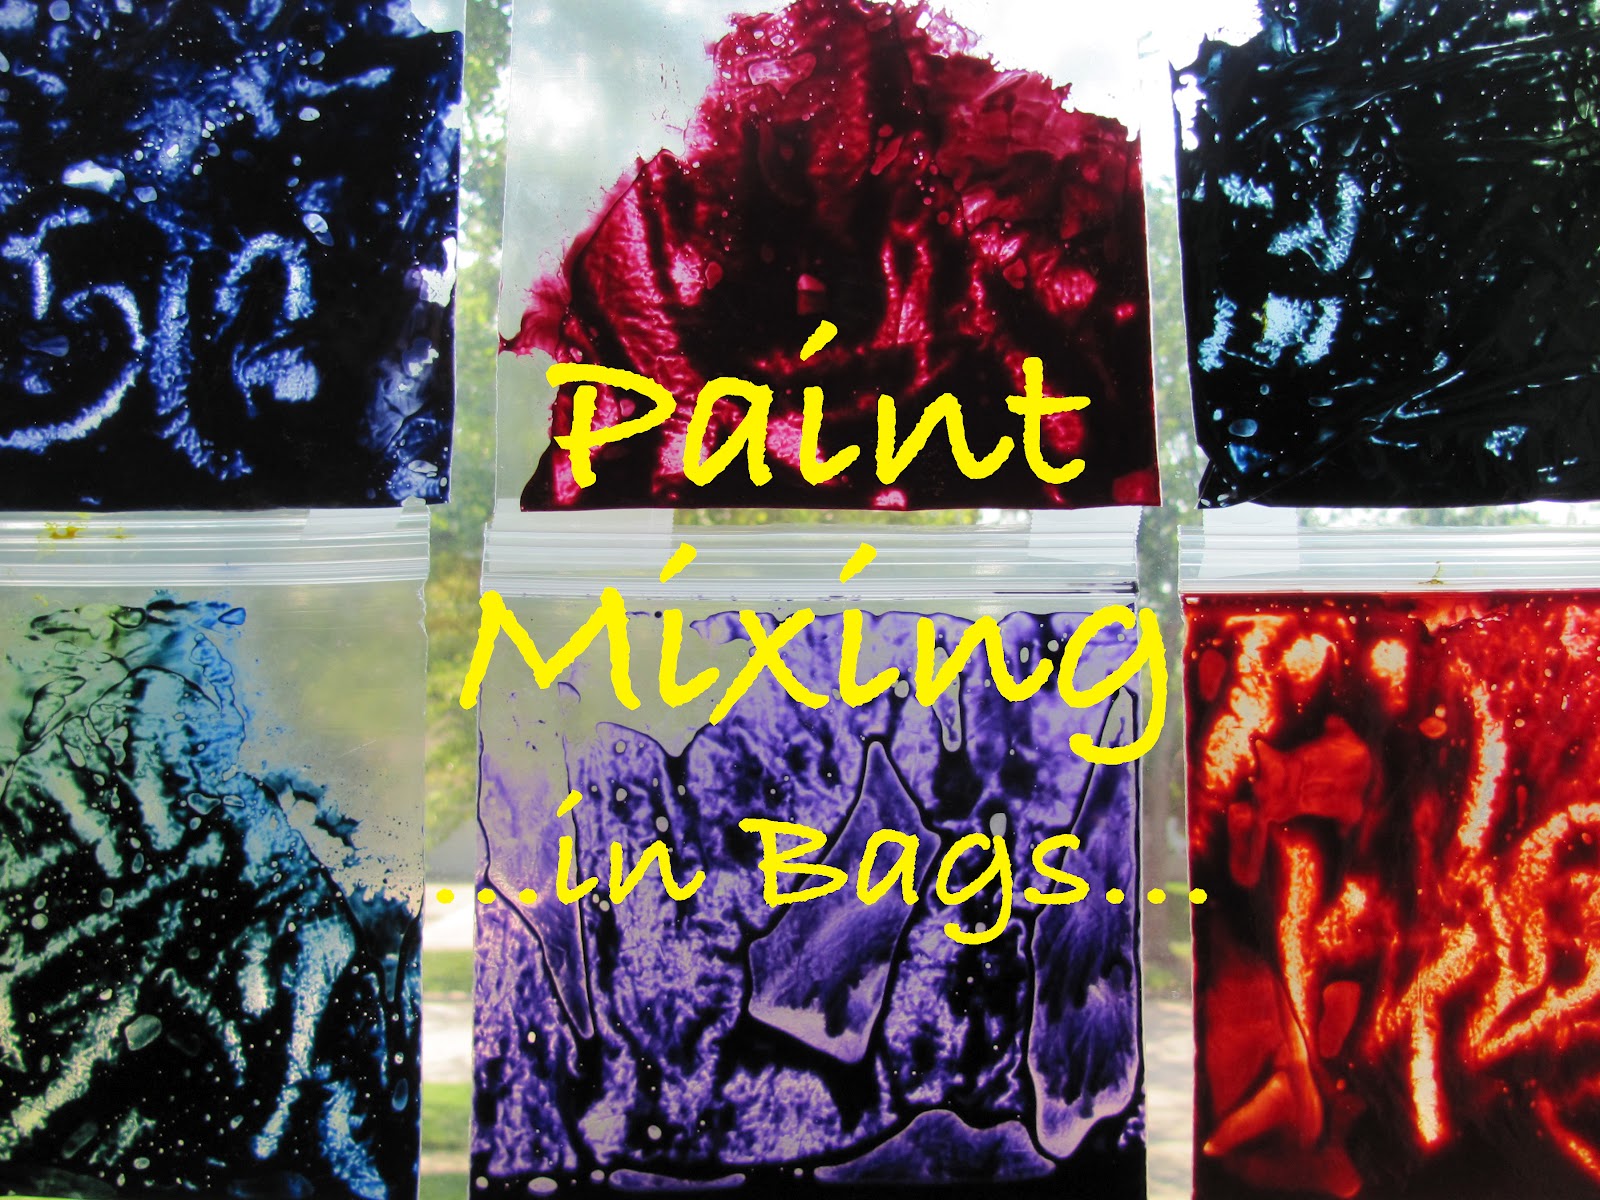
I know this is nothing original, but it was a huge hit with my daughter and the neighborhood kids. All we did was mix paint colors in plastic baggies. The great thing is.....there is no mess! I hung some of the paint mixing bags on the window like sun catchers. I love how they look!
To create Paint Bags you'll need:
Baggies with the zipper top
Paint like tempera or acrylic
Place the paint in the bag.
Squish the paint together.
A great way to experiment with mixing colors without the mess...
We did a lot!
You can draw over the paint.
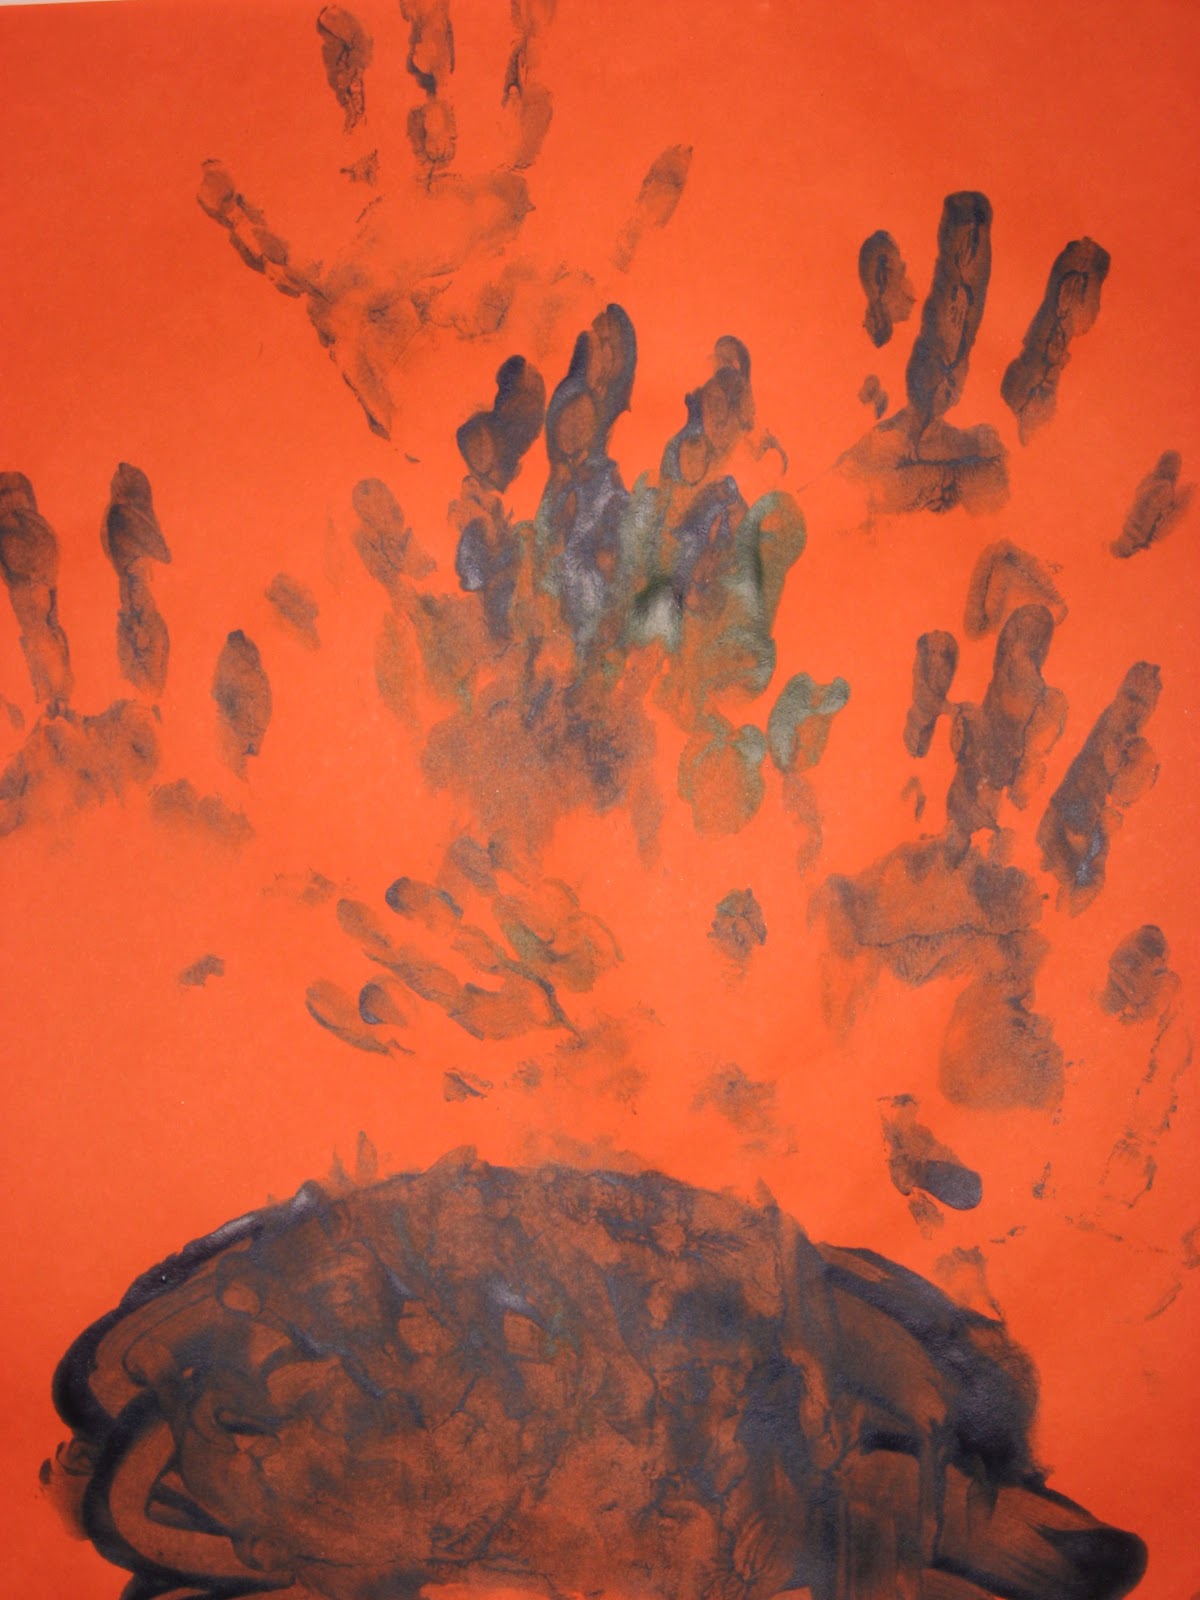
Make no-mess handprints.
Pretty cool?
No mess printing with objects...
Results....
My favorite is when I hung them on the window..... Paint Bag Sun Catchers!!!!!
Again, something so simple always has so many possibilities.....try mixing other things in bags...let me know the results!
If you don't have paint you could use shaving cream and food colors.
The other night when my daughter was supposed to be sleeping she came out of her bedroom and showed me all these amazing drawings. I scolded her, but then I just was so enamored by these drawings that it didn't really matter if she was suppose to be sleeping. WHAT WOULD YOU DO? I'm an art teacher and I am just so proud whenever she is drawing! I just wanted to share these fabulous animal drawings done in metallic, green, purple, and black markers (and blue ink pen) by C. Let me know what you think. I admit this happens a lot....maybe she just knows I don't mind if she stays up drawing?
Duck
Caterpillar
Turtle
Beetle
Dog
Do you let your kids draw (or anything else) when they should be sleeping?
My daughter and I created a painting for "Daddy" for Father's day. He said that he wanted a Jackson Pollock painting and I said we could create one. Currently Pollock's Painting: "No. 5" stands as the second highest price paid for a painting: $140 million so there is no way we could afford that. I thought this would be easy, but for it to really look authentic we had to keep working at it. Pollocks' paintings have a a lot of passion in them. They are considered "action paintings" and they require that you put a lot of energy into them. Most people see them as a bunch of splatters, but if you really take a close look you can see the work put into them. With the painting experience I've had, and by trying to create a Pollock, I realize there is a lot more to these paintings. By the way, my husband absolutely loved his painting! Here is our finished painting:
To create a Pollock we gathered:
A pre-stretcehd canvas
acrylic paints
brushes
sticks
sand
containers
Here is a short video with insight from Jackson Pollock himself of how he painted:
We began painting. We put the canvas on the ground like Jackson Pollock and circled around the painting like it said in the video above. We tried painting with sticks too because Pollock said he preferred those to brushes.
The paint was a little too splattery, (if that is even a word) so we added a little water. Jackson said he liked a more liquid fluid paint and sometimes liked to even pour the paint on so we tried some of that too. You could use an acrylic medium to make the paint more fluid, but we didn't have any....so water seemed to work.
At first the painting looked like this and I wasn't too happy. I wanted a little more fluidness in the painting (not just drips) and other colors.
So we added some orange paint and that seemed to have helped. Some of you probably have know idea what I am talking about....it is just splatters, right?
Here we added more fluid white and really started throwing it around. It is really quite beautiful....all the layers of paint piled on top of each other.
Here is a close up of all all those paint layers and splatters. I think the more you layer the paint the better.
Here is the true measure of success: paint all over me! The only place paint wasn't... was on my head!
We both had paint all over our feet and are still finding paint on our toe nails!
Here is the finished painting again with more white paint action strokes added in.
Here is, "No. 5", Jackson Pollock's $140 million dollar painting.
Do you think our Jackson Pollock style painting was successful?
Daddy truly loooves his painting and it is already proudly hanging up in our house and he has requested to have his painting framed! Wow!
Sorry to be Missing In Action. This has been the least I have posted as of the past few weeks, so I thought some readers may want to know what is up? First of all, I have had the stomach flu for a few days, our basement is being repaired, and I think I may have needed a break too. One of the biggest things on my mind is that I will be going back to work this Fall as a High School Art Teacher. I had been laid off from my job as an Elementary Art Teacher and have been called back to fill the all too unfamiliar role of a High School Art Teacher. I've taught for 10+ years as an Elementary Art Teacher and have always been so prepared and now I feel like a brand new teacher again preparing for High Schoolers. I've always wanted to teach High School Art and I'm excited to take on this new experience in my life, but I know taking this job brings about a lot of change. I will be working full time again and my daughter will be going to Kindergarten Full Day so I have a lot of anxieties about that too. And to add....I worry about: "What Will Happen To The Chocolate Muffin Tree?" Then I think....Do I really need to tell my readers this information? So if you wonder why I may not have as many postings....it may be that I might be busy preparing High School Art Lessons for my new job. I do love this blog and hope to continue posting because I feel I owe it to my readers. I am always doing creative things with my daughter, but I may not always blog about it. I have tons of pictures and ideas to create posts with, so it is not like I will ever have a shortage of material. What I may have a shortage of......is TIME! This blog means a lot to me and has brought a lot of joy and self esteem to me. So thank you to everyone! I hope to continue posting throughout the summer and some during the school year. (We'll see how it goes....) So there....it is said. No surprises.
This is a simple, but an amazing process that artists use to transfer images. We made it more "magical", by using rainbow colors! It can be done in many different mediums too, including pencil, crayon, chalk, and oil pastel. Usually it is done by creating a drawing and then coloring on the back of the drawing and retracing the drawing on the front to transfer it to another paper. Keep reading to find out the process we used to create our own Rainbow Transfer Drawings.
To create your Rainbow Transfer Drawings you'll need:
Oil Pastels or Crayons
White Paper
Pencil
To begin, fold your paper in half and on one side color rainbow colors fairly heavily. We used oil pastels. Oil pastels are more vibrant and you don't have to press as hard to get dark results. If you use crayons press hard and realize you image won't be as vibrant.
Now, fold your paper in half with the colored crayon or oil pastel coloring sandwiched between (the oil pastel coloring should be inside. Begin drawing on the outside and make sure to use pressure when drawing. More pressure will create a better result.
After your drawing is complete, open up for your Rainbow Surprise Transfer Drawing! C could have put a little more pressure, but she still had pretty good results. The cool thing is that you get two drawings: one pencil and one rainbow drawing!
Close up.
My drawing.
My finished Rainbow Transfer Drawing.
Hope you have fun with this. Let me know how your drawings turn out!