Tuesday, January 31, 2012

Craft Caravan Review and {Giveaway}

Have you heard of Craft Caravan?  They are a wonderful company that wants to make craft time simple for parents and FUN for kids!  Craft Caravan has card making kits (sold in class sets too!), eco-friendly art supplies, and a kids craft club that sends your child a theme based craft to make each month!  So if you don't have the time to organize projects for your kids, Craft Caravan is for you! Maybe you just want an extra dose of creativity and surprise for your child each month?  I know my daughter loved receiving the bright green envelope in the mail and was curious what would be inside!  Everyone loves receiving something in the mail and the added plus of a FUN craft kit to make is a plus too!  Craft Caravan sent us their February Craft Package to review and we had a FUN morning creating some Valentine themed projects. Craft Caravan is providing one of my lucky readers a 3 Month Subscription to their craft club! Find out the details after this post on how to enter this Fab Giveaway!

We created the two projects of the treasure chest and bank provided....and more!  We were also able to make a Heart Person and I made a card with the extra supplies left over.


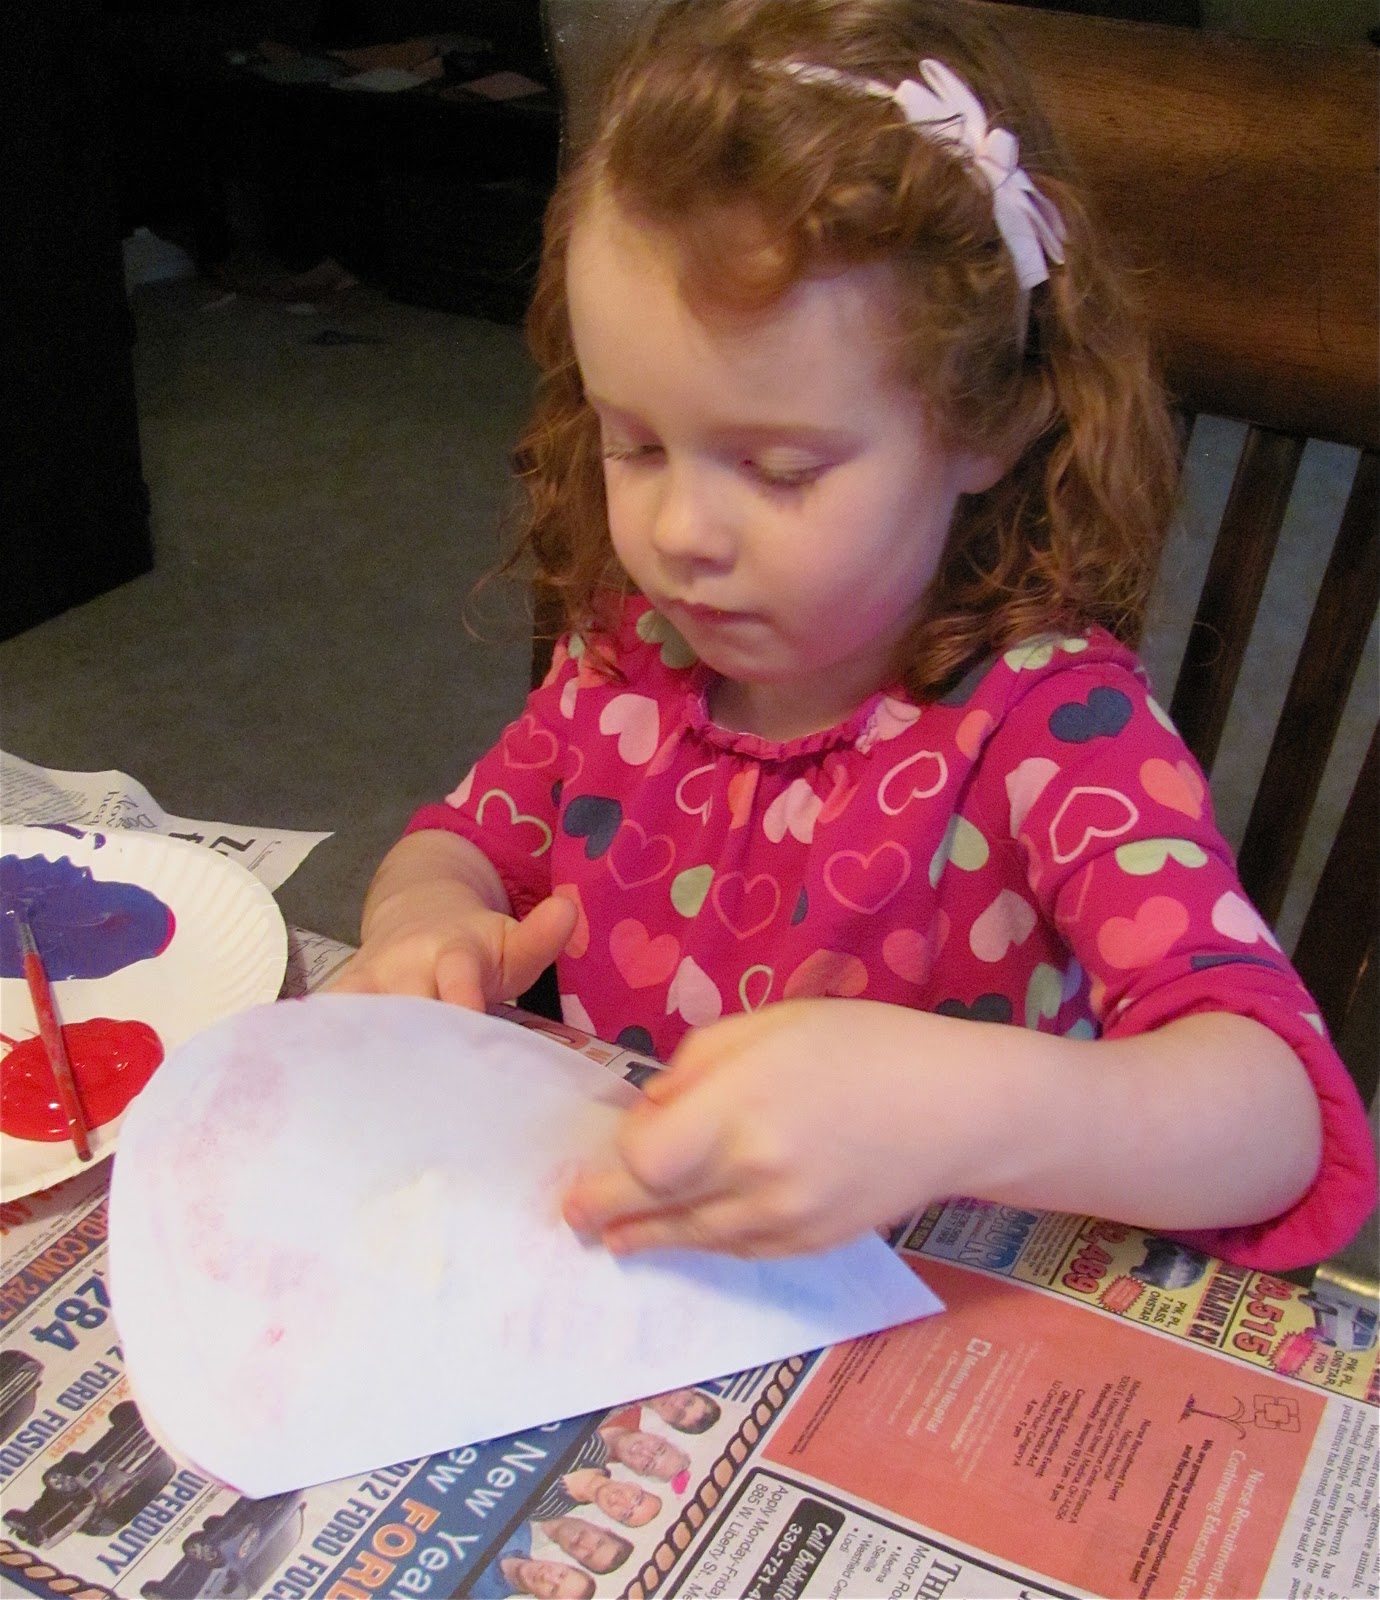
Here is C happily working on her projects.  She loved the idea of the bank and treasure chest! The bank is going to be a gift for Dad.  Craft Caravan provided (along with the cardboard bank and treasure chest) a variety of collage materials to create the projects: metallic hearts,  pretty printed papers, colored scraps, punched papers, and glittery confetti! All we needed were glue and scissors to complete the projects.


Craft Caravan focuses on open-ended craft projects for preschool and early elementary students.  They are also have an Environmental Commitment in which they try to use recycled content wherever they can.  They avoid foam products, use paper envelopes for shipping, and their products are manufactured in the USA and Canada.

Go to CraftCaravan.com and check out their site.  All Chocolate Muffin readers can use the special discount code of chocmufftree to get a BONUS month added on to a 3 month subscription for the kids craft club! A great deal... a savings of $9.95!


Here is your chance to win a 3 month Subscription from Craft Caravan:

Go to CraftCaravan.com and check out their site.  We know you want to win the 3 month Craft Club Subscription,  but tell me in the comment section below which Craft Kit or Eco Friendly Craft Supply you would like best for your children or classroom!

For extra entries "Like" Craft Caravan on Facebook here.

Winner will be selected February 7, 2012 at 10 pm EST.

GOOD LUCK!


Monday, January 30, 2012

Chocolate Chocolate-Chip Muffins....and the story behind the name!

On this past Friday I celebrated my one year Blogiversary of The Chocolate Muffin Tree and within that post I had pictured some scrumptious looking Chocolate Chocolate-Chip Muffins (did you notice?) Today I'm sharing with you the recipe for these wonderful muffins along with the story behind where  the name "The Chocolate Muffin Tree" came from at the end of this post.  These muffins were really yummy and the extra chocolate added just the right amount of sweetness! Chocolate Muffins are not quite as sweet as chocolate cupcakes so they are a great excuse to eat something maybe a little bit healthier! (or not)


Here is the recipe-----I modified a few things, but they were still good! (it comes from the food network website here):

1 3/4 cups of all-purpose flour
2 teaspoons baking powder
1/2 teaspoon baking soda
2 tablespoons best quality cocoa powder (I used Hershey's)
3/4 cup superfine sugar (I used regular white sugar)
3/4 cup semisweet chocolate chips, plus 1/4 cup for sprinkling (I used Ghirardelli bittersweet chips)
1 cup milk (I used soy milk)
1/3 cup plus 2 teaspoons vegetable oil
1 egg
1 teaspoon pure vanilla extract


Preheat oven to 400 degrees

Put flour, baking powder, baking soda, cocoa, sugar, and 3/4 cup of chocolate chips into a large bowl.  Pour all liquid ingredients into a bowl.  Mix the dry and wet ingredients together.  Spoon into paper muffin cups. Sprinkle the remaining 1.4 cup chocolate chips on top and make for 20 minutes or until muffins are dark, risen and springy. Enjoy!

What does a Chocolate Muffin Tree look like? According to C this is what she drew when I asked her:


Do you think I should use this for a logo or symbol for my blog?  Let me know your input.  What do you think A Chocolate Muffin Tree looks like?

***

 Where Does the name "The Chocolate Muffin Tree" come from?

Answer:  After  celebrating her 4th birthday with chocolate muffins,  my daughter said to me while at our garden, "We could plant an apple tree and a chocolate muffin tree!  No, I want to grow A Chocolate Muffin Tree!" Six months later I remembered this story when trying to think of a name for my blog and the rest is history!

Friday, January 27, 2012

The Chocolate Muffin Tree Is One Today!


It is hard to believe one year has passed since I began this journey! It has been FUN, but a lot of work!  I've enjoyed inspiring others to be creative with their children.  It is something I have strived for since my daughter was born.  I remember coming home from the hospital with my daughter and wishing we could create something! (maybe not that soon...but not that far off) Even before I was an Elementary Art teacher, I felt so sad if I saw kids that had no creative materials in their homes. I would ask, "Where are your crayons? your paper? play dough? anything?"  It would break my heart if children didn't have one of those materials in their home.  In my first days being an Art Teacher I worked in inner city schools where I would see students steal sheets of construction paper, pencils, and markers.  Sometimes I just wanted to let it slide by and let them have those materials, but then I would have no materials to work with if I let this happen! After working in urban schools,  I worked in the opposite end of the spectrum: Rural! The rural children had more, but on occasion there would be some students that would try to steal some supplies too.  Sadly,  I was laid of from my rural Art teaching Job because of budget cuts. The saddest thing is that I was replaced with a Non-Art Teacher.  I spoke up for myself,  but it did no good when money is an issue in a school district and where there is little support in the community.


If this "layoff" didn't happen I wouldn't be here writing to you right now! Inspired by Artsy blogs such as The Artful Parent, Paint Cut Paste, and Frugal Family Fun, I began my journey on this day one year ago.  I followed these blogs just like you might be following me with your children doing activities each week from these blogs.  These blogs were such inspiration and I felt like these were the type of Moms I strived to be!  I struggled as a working Mom to feel like I was a good Mom and felt like if I did what they did with their kids that somehow I would be a better Mom.  Being a working Mom was very difficult for me and I so wanted to be the Mom that you see reflected in The Chocolate Muffin Tree! So here I am, now realizing it is a lot of work being a Mom Blogger (Thank you to all that inspire!) and that is also a very fulfilling too! I inspire more people all around the world....more than in all the years I have taught Art! For those of you who have followed me all they way through.....Thank you! and for those who are recent followers Thank you too! I hope to continue this journey! Thanks for your support!

Some Ways to help Bring Art and Art Supplies to the less fortunate:

Find a child near you that is in need of Art supplies and donate to them! (ask local art teachers and I'm sure they could give you some names) Recently I met an 11 year old girl, through a neighbor,  that was definitely an aspiring artist in need and I gave her a simple gift of colored pencils and a sketch pad. You could see her eyes light up instantly with this gift!  I hope to give her more art supplies in the future.

A great article about ways you can donate supplies to classrooms through Adopt a Classroom and  Donor's Choice Donate Supplies to A Classroom in Need

A way to donate art supplies for kids around the world from: Oxfam America Unwrapped

Research online and you will find many local organizations to help kids through the Arts!

Have you ever donated Art Supplies to those less fortunate?
(please share any other great ideas or organizations)

Wednesday, January 25, 2012

Heart Blotto Valentines

We made Heart Blotto Valentines! They turned out simply gorgeous! (keep reading to see more that we made!) Paint Blottos are always a Fun process and create a Wonderful result!  We created our Blottos on a heart shape since we were going to create them into Valentines.


To create a Heart blotto all you need is:
 Heart Shaped paper
Brushes
Tempera paint


To begin, fold your heart in half so you form a crease in the middle of the heart.  Then use a paint brush to put paint blobs or shapes on one side of the paper.


Then, refold the paper and rub gently over the outside so that the paint transfers to the other side.


When you open the paper you'll have something like this below.  You can keep adding paint each time you reopen the paper. You want to put wet paint blobs so that the paint will transfer.  If the paint is dry tit will not print on the other side.


We made a bunch of hearts of all different sizes.  Making blottos is very addicting! Cassie was having fun using her imagination to tell me what the blottos looked like (lots of faces, trees, angels, and more!)
Paint Cut Paste did a whole post on imagining images in their blottos and naming them! Check out the post here.


After the blottos were dry,  we glued them on red, pink, or any valentine color.  Then we cut around the heart,  but made sure to leave an edge to create a frame around the painted blotto.  As you can see, we used some of our fancy scissors to create a more elegant touch! I LOVE these! What do you think?


I know we'll be creating more Heart Blottos soon!  They make very unique Valentines! You could create a message on the back and send them to all  your valentines!


Blottos are fun to make when creating Butterflies like Tinkerlab did in this post !

Have Fun Making Blottos!


This post is linked to: It's Playtime, Link and Learn, Show and tell

Tuesday, January 24, 2012

Giveaway: Artterro Eco Art Kit

Last Month in this post  I introduced you to a wonderful company, Artterro, who produces over 12 great eco-friendly art kits for kids and adults!  I'm pleased to be having a giveaway for your choice of one of their their Gorgeous kits! There are so many kits including:  Bubble Wands, Paint with Wool, Wool Felt Bugs, Bookmaking, Garden Art, and more....  I'm reviewing their Wire and Bead kit in this post,  but take a look at all there other kits here. At the end of this post find out how to enter!!!

The Wire and Bead Kit comes with twistable wire of many colors, unique beads, and marbles!! All you need to include is some wire cutters (or nail clippers) and some pliers. 


C jumped right in making a bracelet before I even got a chance to look at the kit!  She definitely needed help, but she could easily string the beads and bend some wire!


Here are our creations! So much Creative FUN! These kits are for ADULTS too....so if you are a creative Mom Like me you'll Love these kits!!! Pick one for yourself to win or buy one!!! If you choose to buy a kit all Chocolate Muffin readers can use the special discount code of TREE20 for 20% off your order until Janauary 31, 2012!!! Go to www.arterroecoartkits.bigcartel.com/ to use the special code!


Here is your chance to win an Artterro Art Kit:
GIVEAWAY IS OVER!!!!
Visit Artterro Site here and pick out a Kit (under $20.00) that you would like to win!
Leave the name of the kit in my comment section below!!!


For extra entries "Like" Artterro on Facebook here
Winner will be selected January 31st at 10pm EST.
Winner will receive a kit of your choice (under $20.00)
Open to US Residents only (sorry)


Good Luck!

Friday, January 20, 2012

Paint Chip Valentine Cards

A few days ago we created Paint Chip Valentine's!!! (I have a thing for Paint Chip Projects if you haven't noticed yet!) We've been getting into the spirit of Valentine's Day by putting up our Heart decorations and by making Snowy Hearts.  C was super excited to get our Valentine making underway since we just took down our X-mas decorations last week.  To create the hearts on our cards we used a mixture of construction paper and paint chips (paint samples).  We began by cutting a zillion hearts!  We folded our papers and I drew a half of a heart so that my daughter could easily cut them out by herself.


We glued the cut out hearts on our blank cards.  I happened to have some red, purple, and white blank cards, but you could use folded construction paper too.  I talked about overlapping and arrangement of the hearts  before actually gluing.  C seemed to grasp the concept most of the time.


Here are some of our finished cards. I love how they look!!!


The next day we added some Metallic Markers to our Valentines for an extra special touch! We used these metallic markers on our Spin Art Valentine's from last year too.


Stay Tuned for more Heart and Valentine related posts!

What kinds of Heart/Valentine projects have you and your children been working on?
This post is linked to: Link and Learn

Wednesday, January 18, 2012

Snowy Hearts

If you've been following me a while you know that I LOVE Land Art.  We've done quite a few Land Art Posts that you can check out here or at the end of this post.  Winter introduces a whole new medium: SNOW!  It adds a crisp white background to everything.  We made Snowy (Land Art) Hearts since Valentine's Day is on our mind! Check them out and let me know what you think!

Evergreen Bush and Cranberries
More Evergreen and Cranberries
C painting our Snow heart on a tree
Recipe for snow paint click here
Finished Painted Snow Heart

A great book to go with our Snowy Hearts is Snow Valentines by Karen Gray Ruelle. The brother and sister cat in this book create Snowy Valentines because they want to be unique! This is such a sweet Valentine book!


I'm sure we will be doing more Snowy Land Art this Winter!
Stay tuned! 


Land Art Posts:
Rain Shadows

This post is linked to: Link and Learn

Tuesday, January 17, 2012

Exploring Snowflakes... Up Close

Have you every really looked at snowflakes?  Real snowflakes up close?  Well,  that is what Cassie and I did recently after finally getting some snow! (snow has been a precious commodity this winter) Either way this activity is fun to talk about even if you haven't had snow or live in an area with no snow accumulation.  Here is a picture of what a snowflake can look like up close.  Keep reading to find out how we did this activity and the fabulous book that we read too!


First we gathered a black piece of construction paper and a magnifying glass.  Some sites like Weather Wiz Kids recommend putting the paper in the freezer,  but it was a cold enough day for us!


Then we caught snowflakes on the black paper and our mittens.  It was a little easier catching them on our dark mittens because our paper would blow about at times!!! We observed lots and lots of beauties! Each snowflake is truly different and it is nice to show this through this activity.  C was a little scientest practicing her observation skills.


When we observed the snowflakes we saw all kinds of shapes very similar (but different) to these pictured below.  Each snowflake is different depending on the temperature,  humidity, wind speed,  and how long it takes for the snowflakes to hit the ground.  I'm sure if we observed snowflakes each time it snowed they would be different.  If you don't have snow you could observe Snowflakes Photographs from a Google Image Search by clicking here.  My daughter was fascinated at looking at the pictures too!!!


An excellent kid's book to go with this activity is Snowflake Bentley, by Jacqueline Briggs.  It is a true story about a man, Wilson Bentley, whom they called "Snowflake Man".  Wilson Bentley was obsessed with taking pictures of snowflakes in the late 1800's and early 1900's.  He was the first to do this and had a true passion for doing this.  He published a book in 1931, Snow Crystals ,with over 2,500 photographs of snowflakes!!! There is a Snowflake Bentley Museum too! 
 

Have Fun Observing Snowflakes!

Links:

Painting With Ice Cubes

This post is linked to: Link and Learn

Friday, January 13, 2012

Two Kinds of Snow Dough

There has been a lot of buzz about Snow Dough lately!!! You ask, "What is Snow Dough?", basically it is White Play Dough.  There are a lot of recipes floating around claiming to be the best recipe for Snow Dough and we tried a few of them.  It came down to two recipes and one that was ultimately our favorite! Keep reading to find out our Favorite Snow Dough!  My daughter and I had a lot of FUN playing with Snow Dough and here are some of our creations:  snowmen, snow snails, and snow caterpillars!  It is definitely fun to add pipe cleaners, buttons, beans, and beads!!!


The Snow Dough pictured on the left is from Family Fun Magazine and you can click here for the recipe. This recipe makes a nice modeling compound and it is made with flour as its main ingredient.  It claims if you put white tempera paint in it that it will make it white,  but not as white as our favorite! This recipe is a cook play dough recipe.

Our Favorite Snow Dough:
The Snow Dough on the right is from the The Imagination Tree (one of my favorite blogs!!!) and you can click here for the recipe.  This recipe uses corn starch (or corn flour) for its main ingredient which makes it a wonderful bright white!  I believe it is the whitest of all the recipes we tried.  This dough is much more smooth and silkier which is always a plus! (it could be the addition of glycerin)  We definitely enjoyed this recipe the best! Oh, and more..... this recipe is is a no-cook play dough recipe and Gluten Free!


With both recipes you can add iridescent glitter and snowflake sequins which adds a sparkly touch!  Both recipes make a great sensory experience for working out tiny fingers.  So whatever ingredients you have on hand I'd suggest you try one of these fab recipes for Snow Dough!


We had so much fun with Snow Dough we decided to pack up some snow dough for our friends along with the accessories of pipe cleaners, beads, beans, toothpicks, and some snowflake sequins.  Our friends had a blast with this and my daughter played with her snow dough for three days straight! Snow Dough makes some great pretend snow play for those of you out there who don't have any snow!!!


Hope you have fun with Snow Dough too! I'm sure you will!!! Let me know if you find (or have) a secret recipe for Snow Dough that you and your children enjoy!

Wednesday, January 11, 2012

18 Creative Ideas For Making Puppets

My daughter and I have created a few different types of puppets in the past months and we've been having a lot of fun with creating and playing with them.  I wanted to compile a list for us (and you)  so that we could try other kinds of puppets! Hope you can find an idea that you like on this list.  I know we'll be making some of these!  Tell me what ideas that you would like to try! Let me know if you do any of them too!


from Krokotak


from: Dr. Jean


from Arts for Life


How to click here


What other puppet making ideas have I left out?
(Please Share!)