Monday, October 29, 2012

Fried Pumpkin Seeds

This is a new one for me.  Have you ever fried pumpkin seeds? I've always baked Pumpkin Seeds, but my husband came across a recipe for frying them. They may not be as healthy, but the great thing is that they only take 5 minutes or so.


To fry Pumpkin Seeds,  place the clean Pumpkin Seeds in a about a couple Tablespoons of oil with salt in a frying pan at medium heat.


Then use a spatula to keep moving the seeds around for 5 minutes or until they are somewhat brown.  They are surprisingly delicious! I actually like them better than the baked version.


Of course my favorite part is carving the pumpkins and I had to share some of our pumpkin designs here too:
My design

C's Design


Have a Happy Halloween!

Pin It

Wednesday, October 24, 2012

Autumn Treasures Shadow Box

We were inspired by Teach Preschool's Post: Our Nature shadowboxes in preschool to make our Autumn Treasures Shadow Box.  It was so easy to make and it was a neat way to collect natural items..... which all kids love.  Keep reading to find out how to make one!


a shoe box lid
white glue
natural items
glitter for fun
yarn for hanging

First,  put about a half inch or so of glue (or a little less)  in the lid of a shoe box lid.  Next,  place your natural items in the glue and then sprinkle with a touch of glitter.  Then let dry flat for a day or two.


After about two days this is  the result.  I think it is beautiful....  The glue seals the leaves and other natural items into the box frame and it dries clear.


We added a string/yarn and it was ready to hang!  Such a fun, simple and lovely project.   Hope you enjoy! What a splendid Autumn decoration or for anytime.


Pin It

Sunday, October 21, 2012

Pumpkin Decorating Event

At my High School I had a pumpkin decorating event this past Thursday.  It was part of a much larger event involving High School Students helping younger kids in the community with crafts, games, face painting, hayrides and more. Thanks to Discount School Supply and Craftprojectideas.com for providing some fabulous donations of craft supplies for the pumpkin decorating.  I got to tap into my Elementary Art Teaching days and so did my High School students.  I think they had just as much fun as the younger kids.  Here is just a sampling of some of the pumpkins that were decorated.

Pumpkins waiting to be decorated!

Decorating fun!


The kids loved it! What a great event!

Here are some of the pumpkins my High School Sculpture class carved to decorate for the event.  For some of my students,  this was their first experience carving pumpkins. Really. I'm glad I could provide them with the experience.


Face painting was a HUGE hit!


High School kids joining in on the pumpkin decorating.

Here are all the wonderful supplies and face paint donated from Discount School Supply.  Be sure to check out their page here for all their great products.

Here are some of the Awesome craft donations from Craftprojectideas.com:  Please check out their page here for all their products and great ideas. You can purchase their products at Walmart.
Thanks to all my High School Students, Discount School Supply , and Craftprojectideas.com for making this event a success!
Pin It

Wednesday, October 17, 2012

Pumpkin Pinch Pots

This is a great little project that I wish I could have done with my elementary art students, but then again I could do this with my High School students on a larger scale too.  High School kids (and adults) love holiday projects so it could be done with any age! I love pinch pots and making them into little pumpkins makes them even more fun! Keep reading to find out how my daughter and I created Pumpkin Pinch Pots. You could make them for any of the Autumnal Holidays.


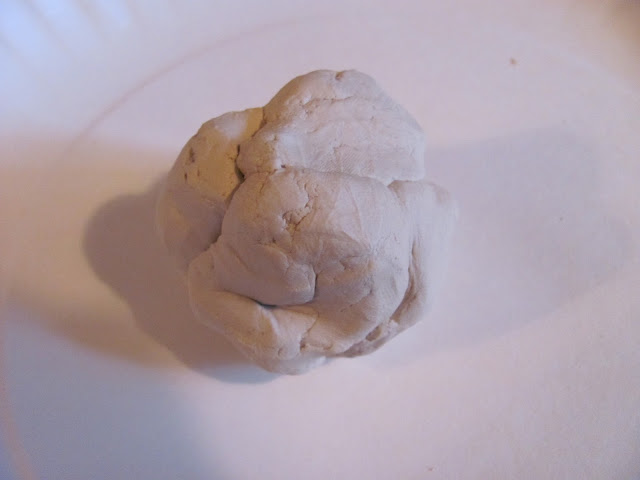
First we began with a small ball of Crayola Air Dry clay.  This is some amazing stuff.....almost as good in quality as Kiln Fire Clay.  If you don't have a kiln or access to one this is a great choice. There is link to Crayola Air Dry Clay at the end of this post.


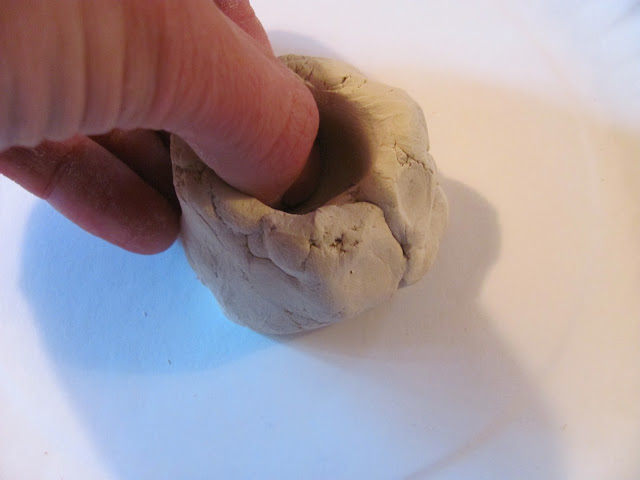
Then we put our thumb into the center of the clay ball.


Next we used our thumb to pinch out the pot to make it bigger.


And bigger...


We also fashioned some lids with a pumpkin stem.


After that that, we carved in lines for the ridges for the pumpkins.


Ta da!


And you can even make a jack o' lantern faces.


Pin It

Sunday, October 14, 2012

DIY Watercolors

For the longest time I've been wanting to make these DIY Watercolors with my daughter and we finally got around to it and I'm sure glad we did! We got the recipe from one of my favorite blogs: Happy Hooligans....do check this blog out for all kinds of kid friendly ideas.  You can find Happy Hooligan's great tutorial on Homemade Watercolors here.  Keep reading to find out our results of these watercolors and the beautiful paintings we created!


To make these DIY Watercolors you'll need:
4 Tbsp. baking soda
2 tsp white vinegar
1/2 tsp. light corn syrup
2 Tbsp. cornstarch
Food coloring
mini muffin tins or ice cube trays for the paints


First,  mix all all the ingredients together (except for the food coloring) in a big glass measuring cup and pour this mixture into your mini muffin tins or ice cube trays.  I filled them about 1/4 inch full.  Then,  add a few drops of food coloring to each section.  Use a toothpick to mix each individual color.  Wait about  a day for the watercolors to dry.  When using the paint add water just like you would with a watercolor set you would buy in the store.


Here is C having a blast with these watercolors:


One of her GORGEOUS paintings:


Another beauty:


Even Mom had FUN:


Hope you have fun making and painting with these DIY Watercolors!

Pin It

Sunday, October 7, 2012

Moon Sand Discovery

We've been wanting to make Moon Sand for a while and we finally did.  Making Moon Sand is a great way to rediscover your play sand.


To create Moon Sand you'll need:

6 cups of Play Sand
3 cups of cornstarch (or corn flour)
1 1/2 cups of cold water

We mixed all the ingredients in a big plastic tub.  We added a little more water and each day it was played with it more water was added.  It was fun to make.


It was fun to add plastic creatures and rocks to the Moon Sand.  It had a nice texture that my daughter enjoyed.  A great new sensory experience.


Moon sand formed into little rock shapes very easily.  I think it is called "Moon Sand" because of this quality.  We will need to get some toy aliens, astronauts, and space ships to add to the fun.


It is always enjoyable to make something new with things you already have on hand.  Moon Sand is definitely one of those experiences.  Hope you have fun making Moon Sand!


Pin It