Showing posts with label Dyeing techniques. Show all posts

Wednesday, March 21, 2012

Naturally Decorated Eggs:Marbled Technique

This is day three of our Egg Week Eggstravaganza with Rachelle at TinkerLab.  Last year Rachelle and I both shared 2 Ideas for Decorating Eggs Naturally.  It was such a success that we are posting it again. Be sure to check out the full details of my Naturally Decorated Eggs: Marbled Technique here.  Tinkerlab's  Gorgeous Vegetable-Dyed Easter Eggs can be found here.


To begin the process, we first gathered  a "raw egg", some materials such as red onion skins, yellow onion skins, blueberries, spaghetti noodles, barley, rice, and more! We placed all this in a piece of cotton fabric and wrapped it up like a little gift.  Pretty strange, huh?


And look at the Fabulous results.  I learned this technique from my third grade teacher and still remember it many years later.... If you are the least bit interested of the rest of the process please check out my post here from last year. You will not be disappointed!


**To find out more about my Naturally Decorated Eggs: Marbled Technique click here.

**And be sure to check out TinkerLab's Vegetable-Dyed Easter Eggs. Click here to find out the details.
**Also, Have you ever wanted to know how to blow out eggs?
TinkerLab shares 3 Easy Tips For Blown Out Eggs here.


***Four More Egg Activities coming your way so stay tuned!***


Tuesday, July 26, 2011

Kool Aid Tie Dye T-shirts

We decided to try one more Kool Aid Project....Tie Dye T-Shirts!  It was definitely a FUN process to learn about the procedure of Tie-Dye, but unfortunately the Kool Aid washes out! (I wonder if using more Kool Aid packets would it work?)  I would recommend to do this purely as a "process project" or maybe just dye something you will not have to wash! (Like our Tie Dye Baby Wipes with Kool Aid!) My Tie Dye Baby Wipes project is featured here,  if you haven't checked that out.  The final product could be a framed work of art rather than a T-Shirt.  I researched further and found out that you can only use Kool Aid as a permanent dye on animal fibers such as: wool, mohair, alpaca, and human hair!!!  Here is C's  Kool Aid Tie Dye Shirt before it was washed!


The recipe we used for the Kool Aid Tie Dye Shirts can be found here. To make the dye for the shirt, first we put a packet of unsweetened Kool Aid in each container.


Then,  put one oz. of vinegar in each container and stir.


Next, fold and twist your t-shirt  and put rubber bands around it!  Patterns for shaping your shirt to create Spirals, V-patterns, and Random circles can be found here.


C used an eye dropper to apply the different colors of Kool Aid to her shirt.  (no worry about the kool aid dye staining her hands with the eye dropper!)  She LOVED this part!


More concentration and more colors! The directions were to set it in the sun to dry.


It said if you iron the shirt on medium high that it will set the colors (we did that!).  Also, to wait 24 hours before washing (we did that!).  The colors faded to a very light color!!!  You don't want to see a picture of that!  Here is C sporting her Kool Aid Tie Dye before the wash!!!!  At least I took a picture!


I'm still tempted to try this again and use more Kool Aid packets to see if it would work better!

   Have any of you had success with Kool Aid and Tie Dye T-Shirts? 


More Kool Aid Fun: Using Kool Aid to dye Wool/Yarn.
                                                       

Monday, July 4, 2011

Kool Aid Painting!!!

We created  Kool Aid Paint! A couple weeks ago we created Microwave Kool Aid Play Dough too!  Cassie really enjoyed the paint and loved how it had a scent.  She made numerous paintings!  It was also FUN to make your own paint and be part of the process!  Kool Aid Paint is super easy to make! All you need are packets of unsweetened Kool Aid and warm water and you are good to go!


We used Orange, Lemon- Lime, Cherry, Ice-Blue Raspberry Lemonade, Grape, and Lemonade flavors for our paint.  All colors were bright except for Grape. It looks more like Black.


We used a muffin tins to mix the paint in and it also made a great paint tray!  First we put each packet in each section of the six muffin tins.


Then we added a Tablespoon of warm water with each packet of unsweetened Kool Aid.  After that, we mixed the water and unsweetened Kool Aid with a paint brush.


Here is C painting a family portrait with Grape and Orange paint.


Here are some rainbows! Lemon Lime makes a WONDERFUL green color!


Here is my favorite painting that C did!  Ice-Blue Raspberry makes a Gorgeous Turquoise Blue Color and Cherry a Vibrant Red!


Mom even gave the Kool Aid Paint a try too! I give it a 5 Star rating! Well worth the 15 cents a pack!


There are numerous things to make with Kool Aid! Last year we even dyed Silk Scarves with Kool Aid!
The Scarf idea we saw over at The Artful Parent.  Be sure to check that post out here!  Here are our scarves we made last Spring.


These scarves have inspired hours of imaginative play! Maybe we will do Kool Aid Tie Dye Shirts one day?  Here is a link for making some.

Linked to:
It's Playtime
Summer Fun

Monday, April 18, 2011

Naturally Decorated Eggs: Marbled Technique

Don't these look incredible?  I am amazed how they turned out. I can thank my third grade teacher for this idea!! Don't you want to know how to make these?  Keep reading.  We collaborated with Rachelle from Tinkerlab and she has some amazingly beautiful Vegetable Dyed Eggs too, be sure to check them out! Click on the link after this post!


 First of all you'll need some uncooked white eggs---no need to hard boil them because this is part of the process.
Besides the uncooked white eggs you'll need:

About a 9x9 inch piece of fabric for each egg
(I cut apart an old dress shirt)

string

for the pigment you'll need:
Onion skins (red,brown,yellow)
spinach
blueberries
cranberries

for texture you'll need:
(I used what I had)
rice
barley
lentils
cooked spaghetti

a cooking pot
water
vinegar

The first step is to take a raw egg and place it in the middle of your fabric.  Be careful---the eggs are uncooked! I had to keep telling my daughter this! This girl is such a ham----or I could have posted the picture of her intensely frowning!!!! (those were my choices!)


Next,  choose red/yellow onion skins and spinach to surround the egg.  Then within those items place rice, barley, lentils, and any other textured food item that will not disintegrate while cooking.  I happened to have some cooke spaghetti and that made some awesome textures!  Also, you can smash some blueberries in there too.  We did some but, I wish we would have added more. Next time!


Cassie enjoyed picking out all the items but she was a little confused with what we were doing?? I had to explain to her that the food has "paint" in it and that it will make the eggs a color! Also, that the spaghetti (which she wanted to eat) and other textural items would create a pattern or design on the egg!


Once you have all the materials surrounding the egg,  then you need to bundle up the fabric and tie it.  Make it a fairly tight wrap, but don't break the egg! Don't they look cute? Reminds me of a meal I make: Rice Bundles! We'll have to do a posting of them!


Now place the bundles in a pot and cover with cold water and add about a 1/2 Tablespoon of vinegar to the mix. The water should be about one or two inches above the eggs. Bring to a boil. Then reduce heat and simmer for 10-15 minutes.  I lifted them out with tongs and set them on a baking rack. When they are cool enough to touch cut the string and you'll be in for a pleasant surprise!


Again, I think they look absolutely AMAZING! I love the spaghetti and rice textures! I also love the touch of blueberry stain. Next time I would make a whole egg with a bunch of smashed blueberries. They  have a very subtle look, but I've loved this technique since I was in elementary school! Cassie enjoyed seeing the result and guessing what all the items were! A little bit like opening a Christmas gift!! Yes, and they are edible hard boiled eggs too!


Do you think you would want to try this technique?

Do you have any ideas for different food items that you might  add to this recipe for this naturally dyed marbling technique?

What are some of your special egg dyeing techniques?

***Be sure to check out Tinkerlab's Vegetable Dyed Egg post here!***


***It sure would be nice to be in the Top 50 on Babble....Click here and give me a thumbs up! THANKS!


This post is linked to:

Egg Dyeing Experiments With Tinkerlab

I was very excited when Rachelle from Tinkerlab asked me to do a collaborative post about egg decorating with her. Tinkerlab is one of my favorite blogs!!! I so enjoyed her post Rolled Easter Egg Painting and gave her the idea of why not  use a wooden egg (instead of a plastic egg) and include that as a creation?---a two for one deal ! You get a decorated egg keepsake and a painting! Rachelle and I are both posting today about the "Two for One" idea and an additional egg decorating idea related to Naturally Dyed Eggs.  Make sure to check out Tinkerlab's post here.(after you check out mine, of course!!!) My Naturally Dyed post can be found here.

Here Are our Decorated Wooden Eggs from our Rolled Easter Egg Painting
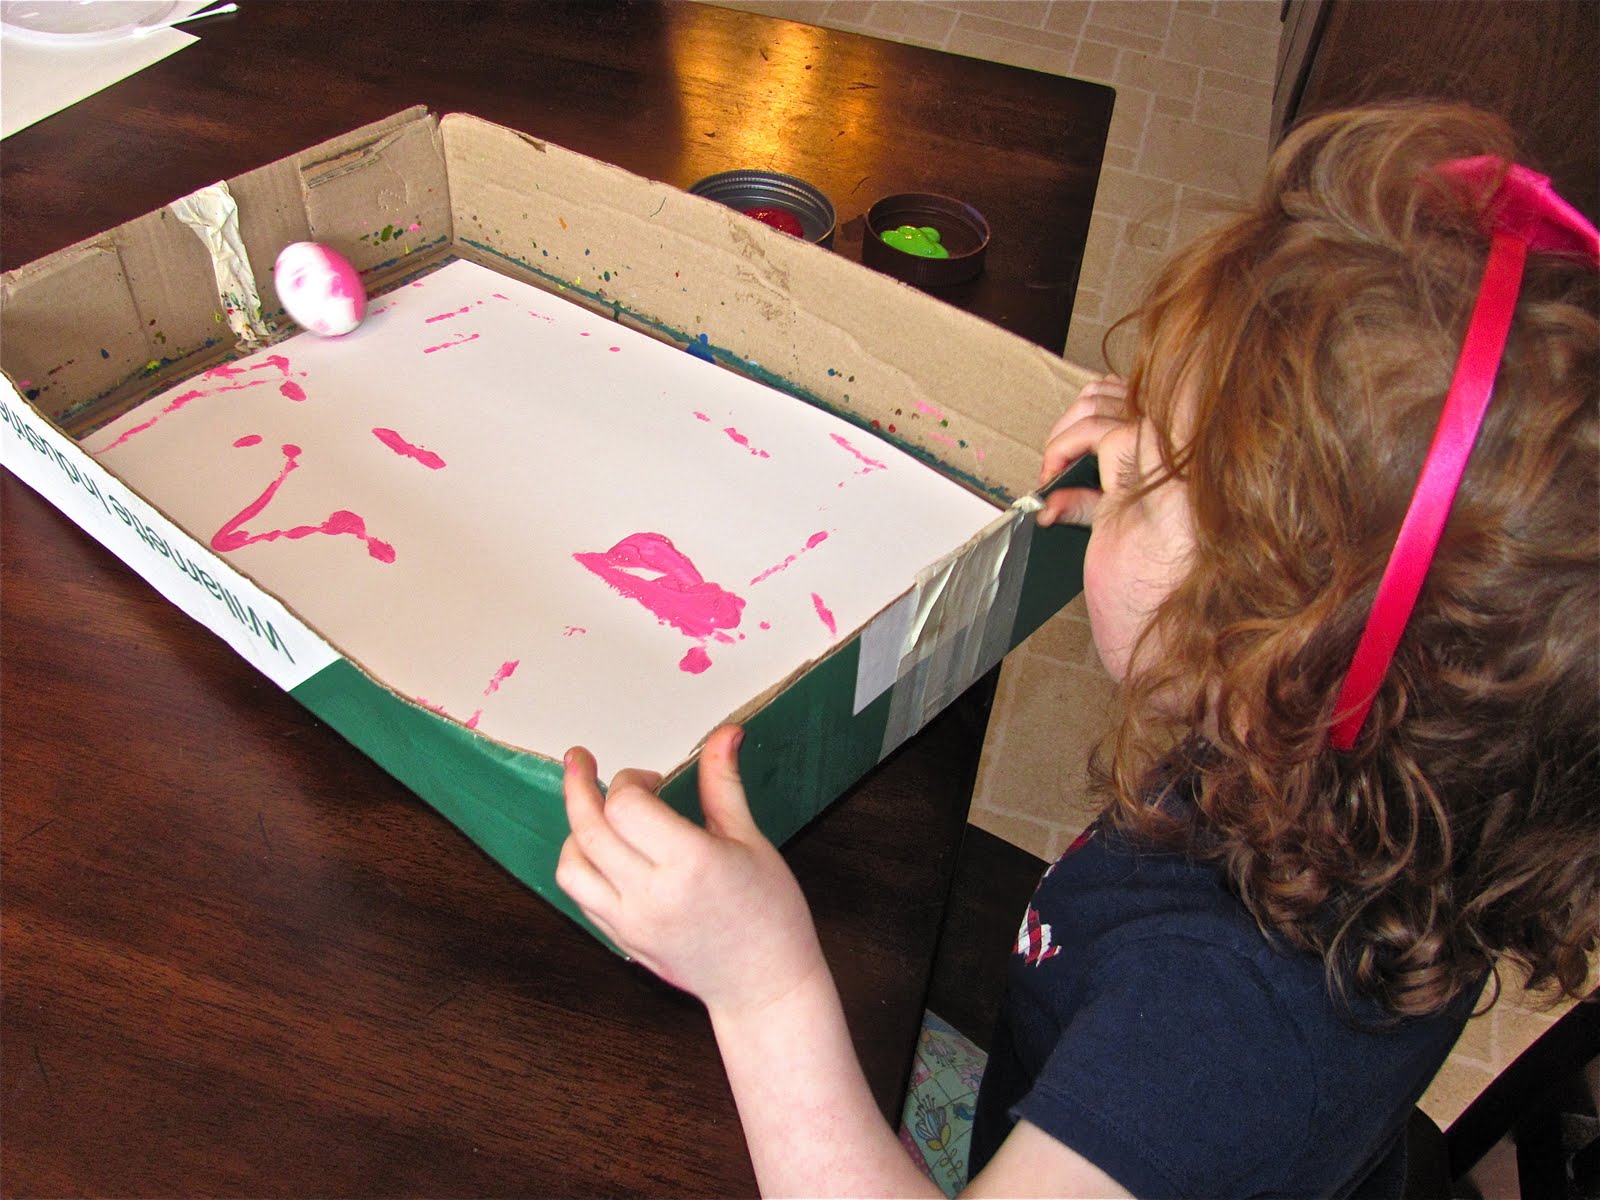
Cassie and I really enjoyed this rolled easter egg painting idea.  I explained it to her in advance and she immediately wanted to get started! You'll need a wooden or paper mache egg, acrylic paint (so it will adhere to the egg), a tray or box lid, and paper to fit.

We dipped the egg in a color and would roll it and repeat the process with other colors. Here is Cassie starting the process.


She really was serious about this and quickly realized that the egg was much trickier to maneuver as compared to a ball.


LOOK at her CONCENTRATION...she was glued!
Cassie really Loved this and wanted to do it again and again!


A Lovely Rolled Easter Egg Painting was created:


And Another painting...Mom loved this too!!!! 
Very Jackson Pollackish!!


And some Beautiful keepsake wooden/paper mache decorated eggs!
Both at the same time: 2 for 1
We did a bunch more!


Love them!
Keepsakes for future Easter baskets to treasure!


Do you have any special Easter treasures that you display year after year?

Be sure to check out Tinkerlab's post on this same process here!
(They added Glitter!)


***Thanks for the Inspiration Tinkerlab!***


**Be sure to check out our Naturally Dyed Marbled Eggs Here!!**


This post is linked up to: