Showing posts with label dyeing. Show all posts

Thursday, April 3, 2014

Glitter Liquid Watercolor Dyed Eggs

We love dyeing eggs!  We are joining in on Tinkerlab's Creative Challenge: Eggs.  Our idea is dyeing eggs with Glitter Liquid Watercolors.  We received a fabulous set of these beauties from Discount School Supply. This has got be one of my top favorite products from them. You can check out their website here, if you want to purchase some. Keep reading to find out how we created these Gorgeous dyed eggs!
Pin It

To create Glitter Liquid Watercolor Dyed Eggs you'll need:

Hardboiled White Eggs
Eye or Medicine Droppers
muffin tin
Bowls
Coffee filters or paper towels
Newspaper
rack to set eggs on

First, grab some Glitter Liquid Watercolors from Discountschoolsupply.com and put some in containers or a muffin tin. A muffin is a great way to divide up the colors.

Place a couple of coffee filters inside a bowl or some paper towels to soak up the excess watercolors.  Then place the egg or eggs on top of the coffee filter and start dripping glitter watercolors over the eggs. This is truly an engaging process to watch the colors flow over the egg and mix together.

Drip as much color as you want and then place the eggs on a baking rack with paper towels underneath to dry. I love the sparkle of the eggs with the Glitter Liquid Watercolors.  Kids of all ages could easily do this process.


Have FUN!


Check out more cool egg ideas at Tinkerlab.com

Monday, March 25, 2013

Metallic Painted Easter Eggs

We made a mixture of commercially dyed and metallic painted Easter eggs and they turned out BEAUTIFUL! I bought the 24 Karat Easter Egg Coloring Kit which is not rated very well by Amazon.com, but we painted our eggs multicolored and we had better results than our single color metallic eggs. We even made paintings on paper with our left over paint which you can see at the end of the post.
Pin It

C happily painting her eggs. She had so much fun!

She enjoyed the commercial dyes PAAS kit too.

We even painted with the metallic colors over the Commercially dyed eggs which gave a nice background color to some of the eggs.
Lastly, we used the leftover Metallic colors to make some wonderful paintings! Mom's painting below.

C's painting.

What Egg Kits have you and your kids enjoyed?


Wednesday, March 21, 2012

Naturally Decorated Eggs:Marbled Technique

This is day three of our Egg Week Eggstravaganza with Rachelle at TinkerLab.  Last year Rachelle and I both shared 2 Ideas for Decorating Eggs Naturally.  It was such a success that we are posting it again. Be sure to check out the full details of my Naturally Decorated Eggs: Marbled Technique here.  Tinkerlab's  Gorgeous Vegetable-Dyed Easter Eggs can be found here.


To begin the process, we first gathered  a "raw egg", some materials such as red onion skins, yellow onion skins, blueberries, spaghetti noodles, barley, rice, and more! We placed all this in a piece of cotton fabric and wrapped it up like a little gift.  Pretty strange, huh?


And look at the Fabulous results.  I learned this technique from my third grade teacher and still remember it many years later.... If you are the least bit interested of the rest of the process please check out my post here from last year. You will not be disappointed!


**To find out more about my Naturally Decorated Eggs: Marbled Technique click here.

**And be sure to check out TinkerLab's Vegetable-Dyed Easter Eggs. Click here to find out the details.
**Also, Have you ever wanted to know how to blow out eggs?
TinkerLab shares 3 Easy Tips For Blown Out Eggs here.


***Four More Egg Activities coming your way so stay tuned!***


Tuesday, February 21, 2012

Pasta Collages

FYI:In my last post we created Colorful Pasta Sculptures and we are still at it! This time we created Pasta Collages.  C asked to create with pasta again and she rarely ever asks to do make anything again so I thought, why not?  I enjoyed creating with this colorful pasta too! Here is my finished Pasta Collage.


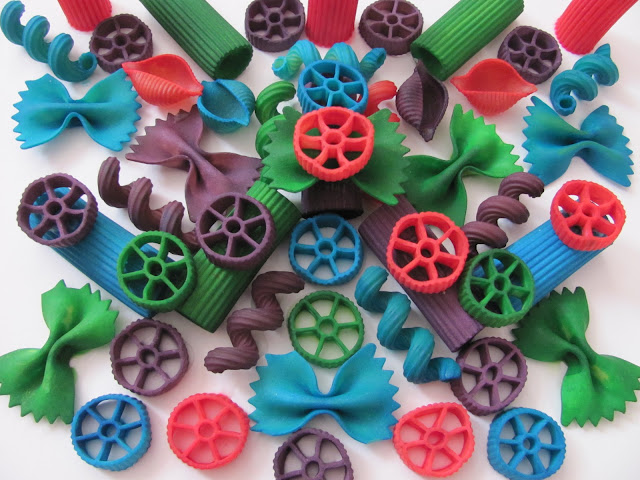
If you missed our post on Creating Colorful Pasta Sculptures you can check it out here.  To prepare for these pasta projects, we first used this pasta dyeing process found here at ehow.com.  Again,  you can also buy pre-colored pasta here if you want to skip that step.  For the collages, you can definitely use white glue since the stability of a collage is not as important as a sculpture.  C chose to use her low temperature glue gun again....she is very proud of her skills.  She loves using it because is so much safer than our old hot glue gun!


Her collage came together pretty steadily.  She worked on it for about an hour! I was very proud of her to stay so dedicated and focused!


Doesn't the collage look so cool up close?  I love all the bright colors and textures!


Here is C's masterpiece!  I think it turned out AMAZING!
I think we inspired each other!


We may make Pasta Frames next like this one below at Teaching Ideas.  Pretty Cool!


What have you made from Pasta with children?


FYI: We used Neon Food Color to create our fabulous colors!


This post os shared with: It's Playtime

Thursday, February 16, 2012

Creating Colorful Pasta Sculptures and a Book

We made Colorful Pasta Sculptures!  Inspiration comes from Storybook Art, by MaryAnn F. Kohl.  Each art project in Storybook Art incorporates a book/illustrator and there are 100 ideas! The particular book that goes along with this project is Strega Nona, by artist and illustrator Tomie dePaola.  This project and book particularly appealed to my 5 year old.....she loves any kind of building or sculpture project!  This project requires some preparation of dyeing the pasta (or not) and letting it dry before the sculpting/building process begins. I would give about a day for dyeing the pasta and letting it dry. Here are a couple of our finished pasta sculptures.


For this project you'll need:

assorted pasta shapes (we used lasagna, manicotti, rotini, bow ties, rigatoni, wheels)
***you could also purchase pre-colored pasta 
Food coloring
rubbing alcohol
resealable plastic bags
wax paper
white glue
low temperature glue gun(used with adult supervision)

The first step is to either buy pre-colored pasta or to dye your own.  To dye your own pasta, there are great instructions found here at eHow.com. You'll need to let the pasta dry overnight.  It is a fun process and C and I have done before when we have made pasta necklaces.


Once the pasta is dry you can start building! We used a low temperature glue gun, but you could also use white glue. With white glue,  you will have to allow for drying time to ultimately hold your sculpture together.  I supervised C closely when using the glue gun.  Sometimes the strings from the glue can get frustrating, but the low temp glue gun is a great tool for fast building.  To build the sculpture, we tried to begin with a larger base noodle like lasagna or a manicotti. Then we added smaller pieces on top one by one.


Here is C in action with her glue gun.  She was very empowered with using the glue gun.  This gun pictured is her own!


Mostly all of our pasta sculptures became some sort of vehicle.  Here is a race car.


An airplane.


Our collection of 3 vehicles.  They look very Dr. Seussish to me.  What do you think?


Not all of the sculptures were vehicles! Here is a self portrait of C.  Notice the red curly hair, blue eyes, and purple hair bow! I love it!


My daughter really enjoyed creating these Colorful Pasta Sculptures.  The book that goes with the activity, Strega Nona, by Tomie dePaola is a favorite of ours too.  It is a magical story about pasta!


 I highly recommend Storybook Art by MaryAnn F. Kohl for other wonderful literature/Art activities.


Macaroni/Pasta Art Inspiration:

Amazingly enough there are some Pasta sculptors out there!  Here are some Penne Sculptures made by: artist: Eliza Tyrrell.  Never would have thought?  Here are some more pics of her Pasta Sculptures here.


A pasta  sculpture of The Chrysler Building is pictured here by artist Alex Creamer.

Some pasta sculptures by an art student from New York are pictured here.

Macaroni sculpture from Flickr here.

Are you inspired to create Pasta Sculptures?


We used Neon Food Color to create our Fab colors:

This post is linked to: It's Playtime, Show and Tell