Friday, January 6, 2012

Snowflakes From Recycled Water Bottles

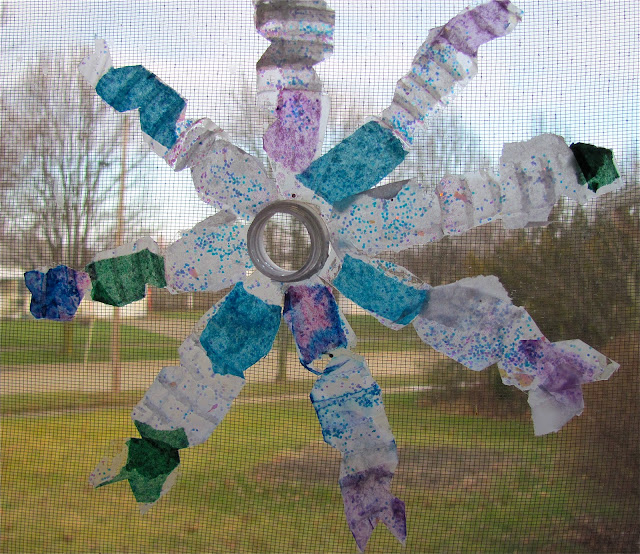
Today I'm guest posting over at The Artful Parent!!! I'm truly honored to be on Jean's blog since her blog is one of the main reasons I started The Chocolate Muffin Tree.  I started following The Artful Parent in 2009 after seeing it recommended in Parent Magazine.  I hope you can pop on over to find out how we made these Snowflakes From Recycled Water Bottles here.  We had a lot of FUN and they turned out GORGEOUS!
Thanks to The Artful Parent for her continued inspiration...hope you enjoy the post!!!


Thursday, January 5, 2012

An Experiment in Making Snow!

I often think about my readers that don't get snow,  so I thought they would appreciate a post on making snow!  We haven't really gotten much snow here in NE Ohio until recently and I can't imagine never really experiencing snow.  We had fun comparing our real snow to our homemade snow.  To create some snow all you need is a blender and some ice cubes!


First, pop about 16 ice cubes in your blender.


Then blend until you have ice that has turned to snow.  Make sure your blender is strong enough to grind ice! Here is our Instant SNOW!!!


C was AMAZED that we made snow!  We ran outside and grabbed some REAL snow and I told her to make some observations.  Can you guess which one is the real snow????  Pretty convincing???


C noticed the REAL SNOW was colder,  softer, and didn't taste as good!!!


C observed the HOMEMADE SNOW was warmer,  harder, and tasted better!!!  Both snows could form into snowballs when warmer.  Both melted....the homemade snow melted faster!


C had a great time with this experiment and I'm sure she will ask to do it again!!!

Check out this link from Weather Wiz Kids to find out all kinds of FACTS about SNOW,  like How is Snow Formed,  How do Blizzards Form, What are Snowflakes, Why is Snow white,  and more.....

If you don't want your snow to melt try some Insta-Snow and you just add water!

Also, check out this GREAT post At TinkerLab:  Making Fake Snow for some tips about Insta-Snow!!  

Which Snow do you think is the REAL SNOW in the photo with the two bowls of SNOW??? (the left or right bowl)

This post is shared with: It's Playtime, The Play Acdaemy, Link and Learn

Tuesday, January 3, 2012

Bird Feeder Garland

This is a great all around activity that C really enjoyed!!! We created A Bird Feeder Garland using bread, cranberries, and oat cereal! The great thing is that this activity goes along with a wonderful book that I just discovered recently!  Keep reading to find out what the book is and be sure to check it out at your local library!!! It is a perfect after Christmas read!


First,  to prepare the bread in a fun way, we cut out shapes with cookie cutters!


Then , we used a straw to create a hole in the middle of each bread shape so they would be easy to place on a needle and string.  I also put the bread in a 250 oven to toast the bread a little so it wouldn't tear while stringing.  You could also let the bread dry out too!


After the bread was prepared,  I put it in a bowl along with the cereal, and cranberries.  Also, use frozen cranberries because they are easier to string with less mess!  We used a tapestry needle for stringing and yarn for our string.


C took a little warming up to begin this activity, but once she got started she kept going!  She kept saying look how long her garland was....very proud indeed!  You could work with patterning and measuring for this activity.


Here are our finished garlands ready for hanging on a tree or bush outside.  Just happened to finally snow and  I'm sure birds and animals will be happy for this wintery treat!  I also used our popcorn garland from our Christmas tree to go along with our Bird Feeder Garland!


The perfect book to go along with this activity is The After-Christmas Tree  by Linda Wagner Tyler.  I accidentally checked this book out for Christmas and was pleasantly surprised!!! It is about a family that is saddened by the ending of Christmas and they have a Winter Party and create decorations to feed the animals for their discarded Christmas tree outside!  C loved this book and keeps asking me if we are going to have a Winter Party?  This activity might just become a tradition that we do after the holiday season!


What are your After Christmas Traditions?
This post is linked to: The Play Academy

Monday, January 2, 2012

My Favorite Post(s) of 2011 + More

I'm joining with other bloggers in posting our "Favorite" or "Best" Post of the year 2011.  My best post of 2011 is Bubble Printing Fun with over 630,000 views! (See My Top 5 Posts of 2011 here.)  My Favorite Post for 2011 is my Recycled Paper Tube Sculpture pictured below!!!  I love this post because it incorporates building with recycled materials and painting.  These are two things I love best when developing an Art Activity.  Both types of activities are very open and process based which are winners with me!  Oh and I almost forgot.....I love sculptural projects too!!!   Check out the original post here on Recycled Tube Sculpture and tell me what you think?  I also included 4 more favorites of mine below (it is difficult to choose!)  Be sure to check out all of the other "Favorites" below from other bloggers in the linky party at the end of this post.

Recycled Tube Sculpture


Spin Art Valentines


Cut Up Cardboard Box Sculpture


Recycled Paper Tube Collage


Egg Shaped Lanterns

Other Bloggers Involved:


What was your FAVORITE post of mine from 2011?

Sunday, January 1, 2012

Happy New Year Crown!

Happy 2012 to everyone!!!  Hope you had a FUN New Year's celebration!!! Wishing you the best in 2012! Here is a simple crown that you can make with your children to celebrate the new year!


We've made crowns before in a previous post of you want to check out how we made them here.  First, I took a 12 x 18 piece of construction paper and drew a zig zag design. If you fold the paper in half you'll have two pieces to connect together.


Here are the two pieces. Just staple together and you'll have a longer piece of paper to create crowns to fit around your head.  You could use a 24 x 36 piece of paper to already have a piece of paper that is long enough.  We cut out the numbers for the year in black paper and glued them in the center part of the crown.  We used glitter glue to decorate,  but you could use whatever you like:  pom poms, sequins, pipe cleaners.....go crazy!


For a finishing touch we added tissue paper tassels to the the points of the crown!  To make those: first, gather about six 4 x 8 pieces of tissue paper stacked on top of each other.


Then, cut into the tissue paper layers to create fringe and don't cut at the top!!


Twist the uncut part at the top and wither glue or staple them to the tops of the points of the crown! Let the glitter glue dry and you are ready to celebrate!


Happy 2012!!!
Looking forward to sharing more creative ideas with you...