This is definitely a unique idea that I had never seen until this year. This idea comes from C's Teacher and I think it is Fabulous! I was able to help the day they did this so I got a "sneak peek" to the process! Here is C's project from the day and we did it again at home so I could show you the process and plus these collages make such a Gorgeous gift! I think the collage has the look of Handmade paper. What do you think?
You'll need:
Pressed Leaves and Flower petals (you could use pressed flowers too)
A large Easel or Flat paint brush
A mixture of 2 parts white glue and 1 part water
Piece of white Tagboard or Scrap book paper (thicker)
Facial Tissue (one layer of the three+a piece of another one)
***C's teacher used Extra Large tissues from Kleenex (one layer of the three) (larger than normal)
Background paper if desired
First and foremost when creating this project, you need leaves and petals...or any other natural item. The leaves/petal/nature must be flattened in a book for a couple days!!!! Lovely Leaves! (I heart Fall)
In preparation, separate your facial tissues into three thin layers. Again, I used regular size tissues + added the piece of another one to make it the Extra large size. C's teacher used Extra Large Tissues from Kleenex and made that the size of the project. I found these tissues on Amazon.com here, but they may be in your Grocery Store.
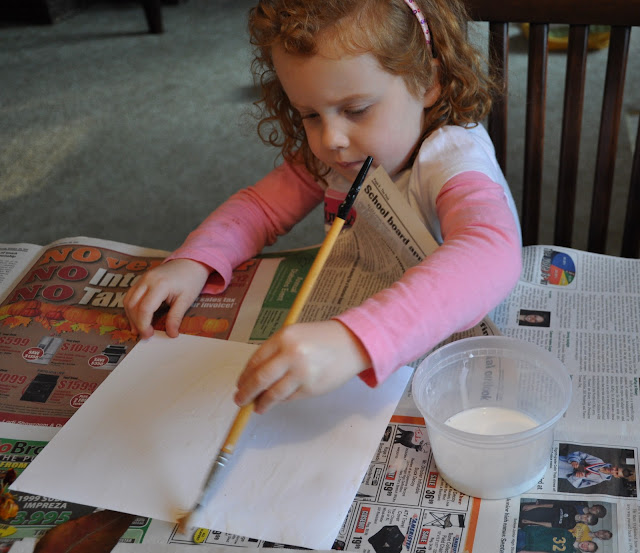
Your tagboard should be the size of the facial tissue that you will put on top of the leaves in a later step. Now, take your 2 part white glue to 1 part water mixture and brush it over your tagboard.
Place your leaves and petal over the glue mixture and make sure they are sticking! Also, you may want to cut off the bumpy end on the stem of all your leaves so they lay flat.
Now carefully (with an adult's help), place the thin facial tissue over the leaves and press down a little. You can see I used a whole regular tissue plus a little more from another (see the rough edge on the right) Make sure the edges are rough if you are joining 2 pieces together because then you won't notice the two separate pieces as much!
***You don't just brush over the normal way...so STOP and pay attention closely! You dip the brush in the glue mixture an carefully roll the brush part over the top of the tissue. Basically you are flattening the tissue a little and letting the glue seep through so it will stick. Make sure to go over everything! Do not rush because the tissue may tear and it may tear either way...but it can be repaired! (no worries!)
As you can see there is a small tear in the top middle and it can be fixed! Just tear a small piece from the one layer of tissue and roll the brush over the area with the glue mixture. When done, let dry!!!
Frame it with a colored piece of construction paper (or not) and you are finished! Pretty!
Here is a close up view in which you can see all the great texture!
We made a few extra.... so they will be gifts that I'm sure others would love to frame!
What Do You Think???
I absolutely LOVE this! (thank you to C's teacher!)


Oh, my!!!! Those are gorgeous!!!!!!
ReplyDeleteThese are lovely, they really do look like handmade paper :)
ReplyDeleteI love how these came out. We are going to have to go on another leaf hunt. :)
ReplyDeleteI'd love for you to share and join my link party: http://tutusandteaparties.blogspot.com/2011/10/pinteresting-linky-party-week-eleven.html
These are really pretty, and I would like to do these myself, I think, but as well this is something I'd like to try with children about Cassie's age. I think it does take quite a bit of control.
ReplyDeleteCassie's turned out really lovely!
brenda
These are so so beautiful, Melissa! This reminded me of the Holi cards we made last year using similar technique but not on tissues but on card stock. We must make these again.
ReplyDeleteI have to get such large sized tissues.
You can see our Holi cards with leaves and petals here: http://mommylabs.gorgeouskarma.com/art_craft_projects_kids/making-holi-cards-with-leaf-and-petal-printing-and-decoupage/
I agree, they're so pretty, Melissa. And this IS a unique project -- I've never seen it before. And your Fall leaves are gorgeous. Ours are still hanging in the trees (my kids were in summer dresses today...can you imagine?!).
ReplyDeleteThat is so pretty! I've never seen that technique! Flowers would add a whole nother element! Beautiful. :)
ReplyDeleteI would love for you to link up to my TGIF LInky Party tomorrow - http://livinglifeintentionally.blogspot.com/search/label/Linkey%20Parties . Beth
ReplyDeleteVisiting from TGIF - this is vey cool. Thanks for sharing
ReplyDeleteI've never seen this technique either...can't wait to try it! Just posted on Craft Gossip. Wonderful Fall Craft!
ReplyDeletehttp://lessonplans.craftgossip.com/?p=5053
great! next week my kids and I will join an educational tour somewhere,we will make sure that we will collect interesting leaves of all shape. thank you for sharing this.
ReplyDeletei never seen this technique before. i m happy to know about.
DeleteSend Flowers Pakistan
Send Flowers Pakistan
Send Flowers Pakistan