Friday, August 19, 2011

Pretend Potions!

This idea came over from Frugal Family Fun Blog!  Check out their post here. When I saw this idea I knew Cassie would love it!  All you need are some recycled plastic bottles, water, food coloring, dish soap, and whatever else you choose (we even added baking soda and vinegar!) You could add funnels too....we did it so spontaneous we forgot!  Now your ready for some Pretend Potions!


Adding some drops of food coloring to the water!


Adding some baking soda to the vinegar to make it bubble!


Watching the experimentation!


Mixing colors...and adding dish soap for bubbles...


We had Fun! Thanks to: Frugal Family Fun Blog!

Tuesday, August 16, 2011

Origami Butterflies

We created simple origami butterflies!  Origami is the traditional Japanese art of paper folding in which no cutting or gluing is used. We used one small cut...so I guess this is not a traditional model, but it was in an origami book! This simple model for a butterfly was found in the book: Origami Magic by Florence Temko. Cassie did a pretty good job following the steps,  considering the complexity of this so called "simple" model. Here is one of her finished butterflies that she decorated with a black marker.  She really did enjoy this and became quite prolific as you will see in the end of this post.  I will show the steps below.  I found a similar origami butterfly here if you want to check that one out too!


Step 1....start with a square paper and fold on this line.


Step 2...it should look like this when folded.


Step 3...fold in half.


Step 5...open up  and cut where I drew the black line. (I did this so C would know where to cut!)


Step 6...fold it back on the crease where the cut is made.  Fold a little over on the side with the cut. This will become the body.  Make the fold on the corner with no cut.


Step 7...open back to inverted triangle and the the middle part becomes the body.


Decorate if desired!


Finished origami butterfly! You can see we added some facts to our project! (book underneath!)


C had lots of fun playing with all her origami butterflies! She made quite a few!


This post is linked to:
Sunday Showcase
It's Playtime

Sunday, August 14, 2011

Oil Pastels and Baby Oil

We drew with oil pastels and painted over them with baby oil.  Here is one of Cassie's flowers drawings! She really enjoyed the process of painting with baby oil.


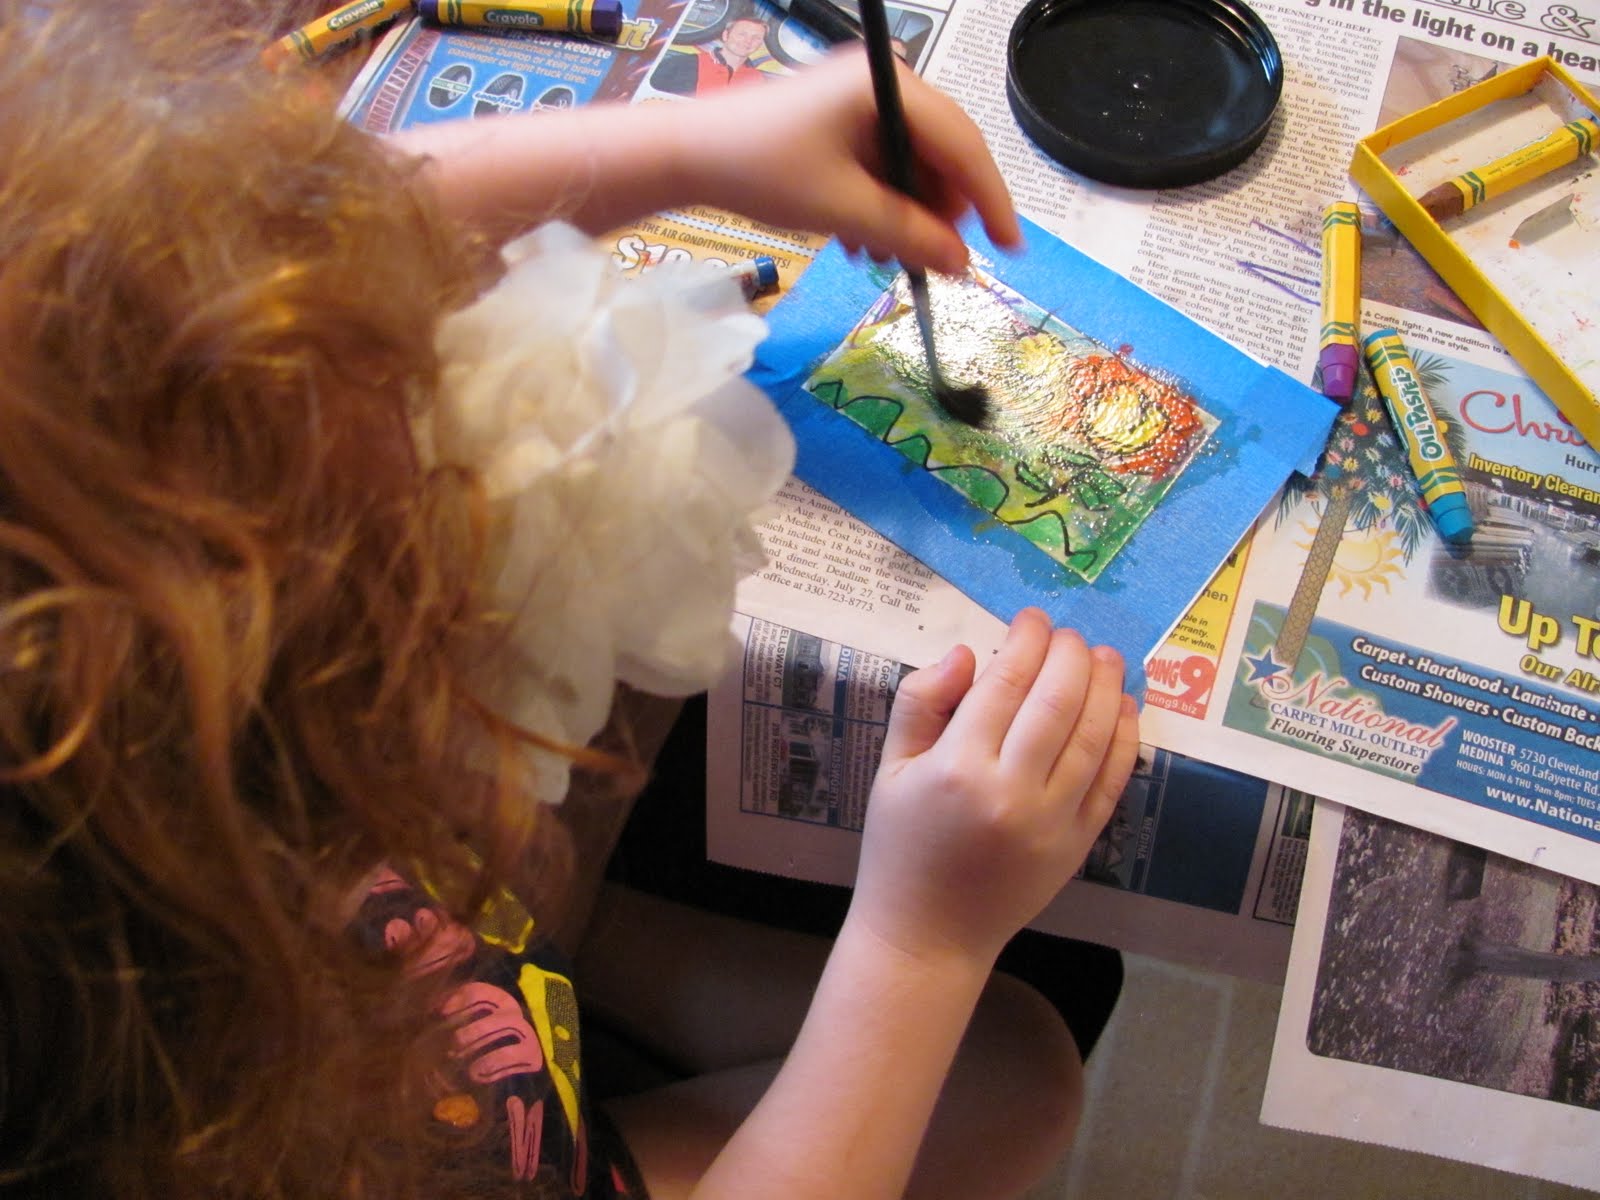
We used Crayola Oil Pastels which are quite vibrant and C always enjoys using them because they are so creamy and bright compared to just crayons.  Here is C painting very seriously over her oil pastel drawing with baby oil.  Make sure you have newspaper on your table!


Here was C's inspiration from our yard! These are all flowers she has picked for me that I place in little jars and bottles because the stems are usually too short! Zinnias, lilies, and marigolds! Love the colors!


The next day we made cards with oil pastels and baby oil.  I taped off a frame with painter's tape and C drew flowers with black permanent markers to give them more definition.


Then C colored the flowers with oil pastel.


Then she painted over the drawings with baby oil....her favorite part! She did over do it a little... and the baby oil seeped under the tape!  I wish you could have seen how delighted she was painting with baby oil!


Here are two of the cards. I think they are lovely and don't mind the baby oil on the edges!  The baby oil really blends the oil pastels nicely!


These cards will make beautiful gifts for a few August and September Birthdays we have coming up in our family! I'm sure we'll be revisiting this again!

What Do You Think???

This post is linked to:

Wednesday, August 10, 2011

Our Land Art

We've created Land Art throughout the summer that I'd like to share.  Cassie and I were inspired by Artist Andy Goldsworthy and his film Rivers and Tides to do Our Rain Shadows (that post is here) and all the following shown below.

Sun and Leaves by Mom

Water, Leaves, Grass, and Flower Floating, by C
Branch Sculpture By C
Branch and Leaf Sculpture By C
Leaves that Blew away By Mom
A found sculpture at a State Park
Mom's Rock Snake
Cassie Building her Rock Sculpture
Nature is so inspiring! I see so many possibilities for Land Art when we are outside and especially while hiking.  If you ever watch the Documentary River and Tides with Andy Goldsworthy.... you will be inspired!!

Other Inspirations 

TinkerLab has a beautiful post on Forest Land Art here.  Be sure to check this out!

Also, be sure to check out Richard Schilling's Land Art Blog here.

Another great Land Art Blog: Land Art For Kids.

I hope all this has inspired you to create Land Art!!!
I'm sure we'll be doing more Land Art in the future!
This post is linked to:

Tuesday, August 9, 2011

Zip Tie Sculptures

This idea is totally Cassie's own doing!  She thought of this all by herself!  While making our Water Wall (last posting), C was fascinated with all the zip ties that I had laid out and she began playing with them.  They are so brightly colored and inviting....I don't blame her! She saw the possibility of threading them together instantly!  C actually called them "her sculptures" and didn't want me to touch them! Fortunately, I had purchased a bunch of them from our local Home Improvement store so I had enough for our Water Wall.  As you can see she came up with a variety of ideas for her sculptural zip ties!


I didn't have any pictures of her working on her sculptures, but here C is proudly holding one of her creations.  She also called them her rockets.


These look like "flag creations".


These appear to be V's.


These are some random sculptures.


I Love when children have their own ideas with no adult motivation.  It really shows that their minds are working creatively! 

Have your children created their own ideas for projects?  Please share.

This post is linked to: