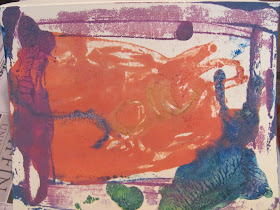
Have you ever used a warming tray to create art? A long time a go my husband and I designed our wedding invitations using this technique. My daughter and I have used warming tray and crayons many times before, but this time we made warming tray prints.
To create warming tray prints you need:
old warming tray (from thrift store)
peeled crayons (soak in water to make them easier to peel)
paper
spatula
Here are some of our finished Melted Crayon Prints:
Beautiful experimentation.
Flowers!
Lovely!
Large flower.
More flowers!
FIrst you draw directly on the warming tray with the crayons. The crayons melt as you draw. Be careful with little ones! Do not touch the warming tray!
Then, place a paper over your crayon drawing to create a print. Use a spatula to help transfer the crayon to the paper better.
Here is C's first experimental melted crayon print.
You can either keep adding crayon to the previous drawing or you can wipe the tray clean and start fresh.
Here are some of our finished Melted Crayon Prints:
Beautiful experimentation.
Flowers!
Lovely!
Large flower.
More flowers!


When I have done this, we covered the tray with aluminum foil so that the tray itself doesn't get dirty. As well, we used wooden blocks to press and rub the paper to the melted crayon. Melted crayon art is so fun!
ReplyDeleteThanks for the tip. We've drawn on wax paper, but never thought of covering the tray to make it easy to clean! It is very fun, I agree!
DeleteThis comment has been removed by the author.
ReplyDeleteDrawing on paper with crayons that rests on the warming tray is one of my students favorite choices in the art studio. Printing like this is a great new idea! Looking forward to trying it this school year! And I love the hint for soaking the crayons! Last year I was peeling crayons and it was frustrating!
ReplyDeleteYes, printing is a new twist and soaking the crayons is a life saver! I wish I knew about soaking crayons....I've peeled my share of crayons too!
DeleteThese are beautiful! I love the effect!
ReplyDeleteThanks....the effect is great!
DeleteWhat an interesting idea! I hope C enjoys the start of the school year, and you enjoy your new job!
ReplyDeleteYes, see has enjoyed it thus far and the job has been great too! It has been a huge adjustment, but one for the better!
DeleteI always have my kids put inexpensive gloves (the one kind fits all sold at Dollar Stores in the colder months) to protect their wrists and hands in case they accidently touch the warming tray.
ReplyDeleteTee glove idea is a fantastic idea (like wearing oven mitts, but with more ease) ! Thanks for the tip!
DeleteWhat is a warming tray?
ReplyDeleteIt is a tray that you usually keep food warm on for parties. They usually have them at second hand stores, thrift stores, goodwills, and you can get them for an inexpensive price. If you buy a new one they are usually $50 or more which I would not recommend buying for this purpose.
DeleteWhat is a warming tray?
ReplyDeleteYears ago my son and his friend made all the flags of the world using wax paper bags, crayons and the warming tray. They won them a lot of fun and first prize in a social studies fair. After they cool they harden and look fantastic. We never tried printing and that sounds like fun!
ReplyDeleteWow that sounds fantastic! Thanks for sharing your idea. You can make so many things with old crayons.
Delete