Collage

Wednesday, February 29, 2012

Painted Blotto Creations

Today I'm guest posting over at one of my favorite blogs: The Imagination Tree.  If you have never checked this blog out it is FANTASTIC!  So many wonderful ideas for Artsy ideas, Sensory Tubs, Baby Play, Treasure Baskets, Messy Play and my favorite: Play Dough ideas.  I consider Anna "The Queen of Play Dough!" So honored to be guest posting on this fabulous blog.

My post is about painting blottos and making them into creations! Pop on over to check out the details of my post here.


Tuesday, February 28, 2012

Creating Rainbows With Toy Cars

Today I'm over at PreK + K Sharing Blog. Please check out my post: Creating Rainbows With Toy Cars here. We had SO MUCH FUN with this! Pop on over for all the details and other great posts on this collaborative blog of very talented bloggers. Let me know what you think.


Monday, February 27, 2012

Styrofoam Rainbow Prints

We've been busy creating with rainbows lately! C loves drawing rainbows and knows the color order of them well too.  Over this past week we decided to create Styrofoam Rainbow Prints.  Pretty Fun and colorful. Keep reading to find out how we made them.


To create Styrofoam Rainbow Prints you'll need:

styrofoam trays
a dull pencil
tempera or acrylic paint in rainbow colors
paint brushes (foam brushes would work great for this!)
paper


First,  cut the edges of your styrofoam tray off to form a flat piece of foam.  Then, you can either pre-plan your drawing and transfer to the foam or draw directly on the styrofoam with a dull pencil.  Press into the foam with the pencil to make an impression, but not so hard that you create a hole in the foam.  My daughter created these drawings pretty quickly....your child may spend more time.  (Remember words will be backwards.)


Then, I put out red, orange, yellow, green, blue, and violet tempera paint with a brush for each color. You could use acrylic paint too.  C then brushed a strip of each rainbow color across her foam drawing.
Try to use a thinner layer of paint or the print will not come out very well. ***A foam paint brush would work really well for this!


Here is how the paint should look.  C's first print did not come out because she had too much paint, but the great thing about printmaking is that you can create multiple pictures if you mess up.


After you have the paint on the styrofoam tray,  take a piece of paper and put it over the painted tray.  Then take your hands and rub over the paper with some pressure so the paint will transfer to create a print.


As you can see, we created many many styrofoam Rainbow Prints. This is the beauty of printmaking and  it is very addicting. I think they are just LOVELY!


What Rainbow projects have you been working on with children?

***Check out our Shamrock Apple Prints and Glue Prints for some more Printmaking Fun.

Thursday, February 23, 2012

Playing and Building With Plastic Cups

There is no need to buy expensive toys....my daughter finds joy in the simplest things.... plastic cups !  We began building with plastic cups about 2 years ago and it has always been a huge hit! Even friends that come over have played with these cups.  I have found them being built with, colored on, jumped over, filled with water, used as cones for riding around, and more!  These cups have probably gotten more use than any other disposable cup!  Here are some cup sculptures filling our whole living room!


More building with cups... you can see we have a great number of cups to play with....maybe that is the secret to why they are played with?


Then one day when we were stuffing our Paper Bag Puffy Hearts with poly-fil stuffing,  I noticed C was inventing her own play with these cups.  She was filling them with toys, yarn, and poly-fil!  This is what happens when you let kids play!!!  I did not tell her to do this at all!


Look at all that is going on here!  What do you think my daughter was creating???  Like I said,  "There is no need for expensive toys!" I guess we need to buy some more cups!!!


I know we'll be creating more with cups in the future!

Have your children been playing with cups? or anything else out of the ordinary?

*****

More Inspiration:
Maybe my daughter is on to something! Look as this beautiful Butterfly Sculpture made out of Disposable cups from EcoFriend.


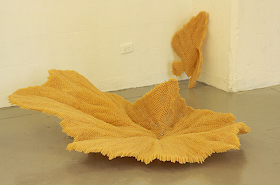
And look at this Cup Sculpture made by artist Tara Donovan from The Boston Phoenix. Just Beautiful!


Now I'm really inspired to create some cup sculptures...


Wednesday, February 22, 2012

Our Local Ice Festival 2012

Our town managed to pull off their annual Ice Festival even though it has been a considerably warm winter! It is a weekend in which ice sculptors come from all over to demonstrate their creative skills.  There is a competition in which the sculptors can win ribbons too. Many of the sculptors had to contend with the warm sun and some even shaded their sculptures with cardboard at certain points!  Thankfully it was colder by Sunday and most of the sculptures held together,  but by Monday there were 40 degree temperatures and sun by the afternoon.  Some of the sculptures were starting to form icicles on them because of the melting ice and dripping!  I just wanted to share some of the AWESOME sculptures that were created considering the warmer temperatures.


It was definitely a great experience to see the ice sculptors at work.  C was fascinated with the variety of tools the artists were using: chain saws, sanders, brushes, and more!


Here is just a sampling of some of the sculptures!  A flying squirrel!


A fish that won a blue ribbon.  Whenever we have gone to art shows C is fascinated with the ribbons.  I try to explain to her that judges pick which ones win! I asked her which Ice sculptures she liked best and she said, "The ones with the ribbons!"


A bee which is our HS mascot! 


A seahorse...which was another ribbon winner.


Not sure if this is Praying Mantis or what? It looks to be part something else.


Ironically, I got a shot of the moon sculpture at night!


The poor Moon sculpture fell over by Sunday morning! Unfortunately, this was a common sight at this years festival!


There were many more sculptures.  We enjoyed the festival and it was a great learning experience for C to watch how the sculptures were made!  Hopefully next year will be colder for the Ice Festival!

Do you have a Winter or Ice Festival where you live?

How has the weather been in your neck of the woods?


Tuesday, February 21, 2012

Pasta Collages

FYI:In my last post we created Colorful Pasta Sculptures and we are still at it! This time we created Pasta Collages.  C asked to create with pasta again and she rarely ever asks to do make anything again so I thought, why not?  I enjoyed creating with this colorful pasta too! Here is my finished Pasta Collage.


If you missed our post on Creating Colorful Pasta Sculptures you can check it out here.  To prepare for these pasta projects, we first used this pasta dyeing process found here at ehow.com.  Again,  you can also buy pre-colored pasta here if you want to skip that step.  For the collages, you can definitely use white glue since the stability of a collage is not as important as a sculpture.  C chose to use her low temperature glue gun again....she is very proud of her skills.  She loves using it because is so much safer than our old hot glue gun!


Her collage came together pretty steadily.  She worked on it for about an hour! I was very proud of her to stay so dedicated and focused!


Doesn't the collage look so cool up close?  I love all the bright colors and textures!


Here is C's masterpiece!  I think it turned out AMAZING!
I think we inspired each other!


We may make Pasta Frames next like this one below at Teaching Ideas.  Pretty Cool!


What have you made from Pasta with children?


FYI: We used Neon Food Color to create our fabulous colors!


This post os shared with: It's Playtime

Thursday, February 16, 2012

Creating Colorful Pasta Sculptures and a Book

We made Colorful Pasta Sculptures!  Inspiration comes from Storybook Art, by MaryAnn F. Kohl.  Each art project in Storybook Art incorporates a book/illustrator and there are 100 ideas! The particular book that goes along with this project is Strega Nona, by artist and illustrator Tomie dePaola.  This project and book particularly appealed to my 5 year old.....she loves any kind of building or sculpture project!  This project requires some preparation of dyeing the pasta (or not) and letting it dry before the sculpting/building process begins. I would give about a day for dyeing the pasta and letting it dry. Here are a couple of our finished pasta sculptures.


For this project you'll need:

assorted pasta shapes (we used lasagna, manicotti, rotini, bow ties, rigatoni, wheels)
***you could also purchase pre-colored pasta 
Food coloring
rubbing alcohol
resealable plastic bags
wax paper
white glue
low temperature glue gun(used with adult supervision)

The first step is to either buy pre-colored pasta or to dye your own.  To dye your own pasta, there are great instructions found here at eHow.com. You'll need to let the pasta dry overnight.  It is a fun process and C and I have done before when we have made pasta necklaces.


Once the pasta is dry you can start building! We used a low temperature glue gun, but you could also use white glue. With white glue,  you will have to allow for drying time to ultimately hold your sculpture together.  I supervised C closely when using the glue gun.  Sometimes the strings from the glue can get frustrating, but the low temp glue gun is a great tool for fast building.  To build the sculpture, we tried to begin with a larger base noodle like lasagna or a manicotti. Then we added smaller pieces on top one by one.


Here is C in action with her glue gun.  She was very empowered with using the glue gun.  This gun pictured is her own!


Mostly all of our pasta sculptures became some sort of vehicle.  Here is a race car.


An airplane.


Our collection of 3 vehicles.  They look very Dr. Seussish to me.  What do you think?


Not all of the sculptures were vehicles! Here is a self portrait of C.  Notice the red curly hair, blue eyes, and purple hair bow! I love it!


My daughter really enjoyed creating these Colorful Pasta Sculptures.  The book that goes with the activity, Strega Nona, by Tomie dePaola is a favorite of ours too.  It is a magical story about pasta!


 I highly recommend Storybook Art by MaryAnn F. Kohl for other wonderful literature/Art activities.


Macaroni/Pasta Art Inspiration:

Amazingly enough there are some Pasta sculptors out there!  Here are some Penne Sculptures made by: artist: Eliza Tyrrell.  Never would have thought?  Here are some more pics of her Pasta Sculptures here.


A pasta  sculpture of The Chrysler Building is pictured here by artist Alex Creamer.

Some pasta sculptures by an art student from New York are pictured here.

Macaroni sculpture from Flickr here.

Are you inspired to create Pasta Sculptures?


We used Neon Food Color to create our Fab colors:

This post is linked to: It's Playtime, Show and Tell

Wednesday, February 15, 2012

Experiment: How Is Frost Made?

We made frost! We've made snow in a previous post and that seemed to be a big hit with those of you who don't get snow, so I decided to do another experiment involving a wintery theme.  (Actually we haven't gotten much snow here in NE Ohio/Midwest either so it seemed to be popular with everyone!)  The experiment for this post: Making Frost! We found this experiment at Weather Wiz Kids here.  Here is some real frost on our garage window which has been a rare sight this winter! There is a real beauty to the frost formations that you find on windows in the winter.  Keep reading to find out how we made frost in the comforts of our own home.


For this experiment you'll need:

2 tin cans without the lid the labels (not pictured)
table salt or rock salt
crushed ice
water
thermometer (if you want for extra fun!)


Here is how to create the experiment:

Fill one tin can 1/2 full with a mixture of crushed ice and 4 Tablespoons of salt.  Mix it well for 30 seconds and let sit.

In the other can put only crushed ice and cool water.  Fill the can about half way full of ice and then just enough water to cover the ice.  


Now let both cans sit.  Observe! One looks a little frosty already....can you guess which one? I asked C to guess which one she thought would form frost....she said,  "The one with the salt."


The frost was forming on the can with the ice and salt mixture.  The other can with ice only was forming just moisture or dew!  We added a thermometer to see what temperature the frost mixture was.
Frost only forms at temperatures below freezing! We found this to be true!  You can see the can on the left is close to zero with the frost on it!  The can with just ice water is like a glass of ice water with moisture forming on it.....which makes sense! We found the thermometer measured above freezing on the can that formed the dew.


Here is the explanation from Weather Wiz Kids of why the frost forms on the can with salt:

The salt wants to absorb water to make a salt solution.  To do that,  the salt has to melt the ice into water. The heat needed to melt the ice comes from the ice itself.  There is a chemical reaction between the salt and ice!  Melting the ice actually makes the mixture cooler.  The salt water mixture gets below freezing so the mixture on from the air collects on the can and freezes.

On the other can,  dew forms because the mixture of water and ice is just at freezing.  The outside of the can is warmer so that is why dew forms!


We have had very few days of below zero temperatures so there has been less frost!  So the reason frost forms on windows and other surfaces is because the temperature outside goes below freezing. (just like the can) When the air becomes cooler, it cannot hold as much water as before. The excess water condenses on the windows. The water become crystalized or (interlocked crystals of water) when the temperature is below freezing.  The cool patterns are formed because of the different air currents, dust particles, and because of scratches in the glass.  Here is C looking at our frost on the garage. Check out this Google Image Search of Frost Photos which are simply GORGEOUS!


We plan to create some Frost Paintings with Epsom like they did here at Brimful Curiosities blog.  We checked out the book:  Here Comes Jack Frost by Kazuno Kohara which was recommended in the same post. It goes well with studies about frost and if you are creating frost paintings!

Other Wintery Experiments:


Have You Done Any Wintery Experiment With Children?
This post is shared with: Weather Blog Hop